The smell of buttery, caramelized dough hitting hot cast iron is honestly unmatched. I still remember the first time I attempted cinnamon rolls on my Blackstone griddle. I was skeptical, to be honest. I thought, how can a flat top possibly create those perfect, fluffy layers that an oven does? Well, let me tell you, I was wrong. And not just a little wrong. I was completely converted.
It happened on a rainy Sunday morning. I had just moved into a new apartment with a tiny, inefficient kitchen oven. But I did have a backyard deck and a brand-new Blackstone. I decided to try making my favorite breakfast treat outside. The result? Sticky, sweet, impossibly soft cinnamon rolls that tasted like a cross between a bakery treat and a campfire snack. That was the moment I knew I had found my new weekend ritual.
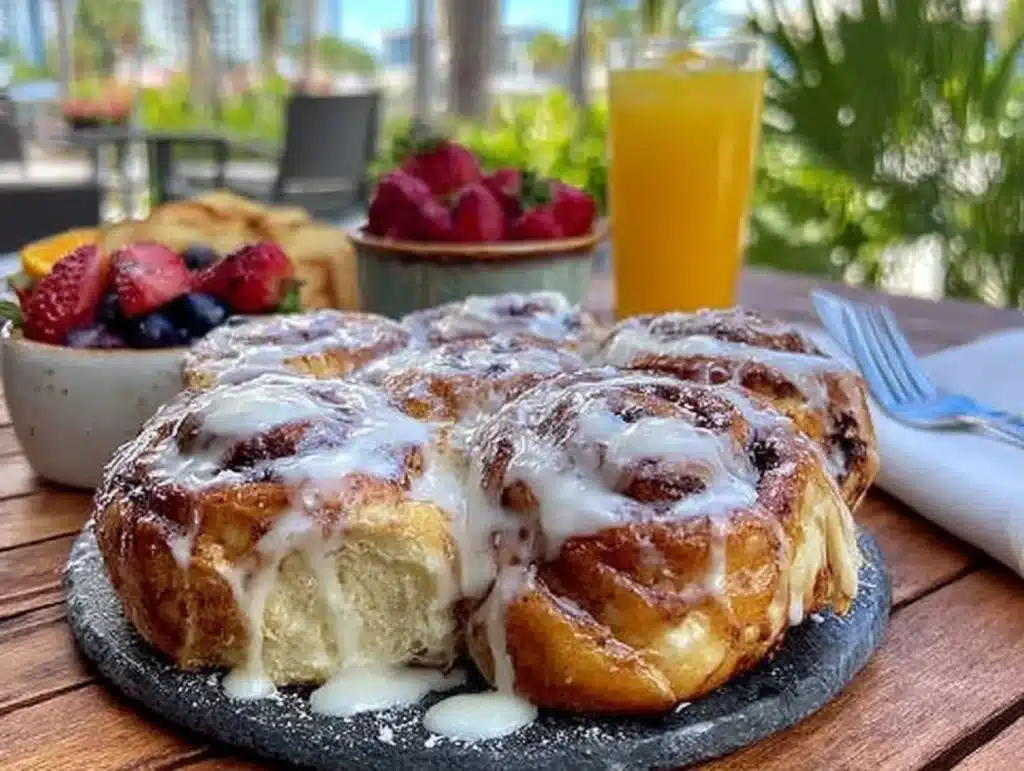
These Fluffy Blackstone Cinnamon Rolls are not just another breakfast idea. They are a game-changer for anyone who loves the convenience of outdoor cooking but refuses to compromise on texture. You get the crispy, buttery edges from the griddle and the pillowy soft center that only slow-fermented dough can provide. It is the best of both worlds.
I have tested this recipe over a dozen times now. I have adjusted the heat settings, changed the butter-to-sugar ratios, and even tried different types of flour. Each time, the Blackstone method has proven superior for speed and consistency. No more waiting for the oven to preheat. No more dealing with hot kitchen air in the summer. Just pure, sweet comfort food made right on your patio.
If you are looking for a way to impress your neighbors or just treat yourself to something special, this is it. The process is simple, but the results are restaurant-quality. You do not need to be a professional baker to make these work. You just need a griddle, some patience, and a willingness to share the first batch (which is nearly impossible).
Let’s face it, we all love cinnamon rolls. But we often avoid making them because of the hassle. The Blackstone method cuts the cooking time in half. It simplifies the process. And it adds a smoky, charred flavor that you simply cannot get in a standard oven. This is the version you have been waiting for.
Why You’ll Love This Recipe
There is a specific magic that happens when yeast dough meets direct heat. As someone who has spent years testing recipes in various kitchens, I can tell you that the Blackstone method offers something unique. It is not just about cooking faster. It is about texture and flavor development in a way that feels almost primal.
- Quick & Easy: Traditional cinnamon rolls can take hours to rise and bake. On the Blackstone, you are eating warm rolls in about 30 minutes from start to finish. This is perfect for busy weeknights or lazy weekend mornings when you want something special without the all-day commitment.
- Simple Ingredients: You likely have everything you need right now. Flour, sugar, yeast, milk, butter, and cinnamon. No fancy specialty items are required. This recipe relies on pantry staples to deliver bold, comforting flavor.
- Perfect for Outdoor Entertaining: These are a crowd-pleaser at any gathering. Whether it is a summer BBQ, a fall tailgate, or a cozy winter brunch on the deck, they are always the first thing to disappear. Kids love the sweetness, and adults love the novelty of griddle-baked goods.
- Unbelievably Delicious: The texture is next-level. The bottom gets a slight crust that contrasts with the soft, airy interior. The cinnamon filling bubbles up and caramelizes against the hot metal, creating little pockets of sticky sweetness that are addictive.
- No Oven Needed: This is huge for keeping your kitchen cool. In the summer, firing up the oven feels like a punishment. Cooking on the Blackstone keeps the heat outside where it belongs. You get the comfort food experience without the stuffy kitchen.
- Consistent Results: One of the biggest struggles with baked goods is uneven heating. The Blackstone provides a large, even surface area. You can monitor the browning visually, ensuring every roll is golden brown and perfectly cooked. It takes the guesswork out of baking.
What makes this recipe different from the rest is the technique. We are not just throwing dough on a hot plate. We are using a specific folding method to create layers. We are controlling the heat to simulate the environment of a convection oven but with direct contact. It is a clever twist on a classic. It is not just cinnamon rolls; it is the griddle version of them. And it is better than you expect.
What Ingredients You Will Need
This recipe uses simple, wholesome ingredients to deliver bold flavor and satisfying texture without the fuss. The beauty of Blackstone cinnamon rolls lies in the quality of the few components you use. Since there are no complex spices or exotic flours, each ingredient plays a crucial role in the final structure and taste.
- All-Purpose Flour (4 ½ cups): This is the backbone of the dough. I recommend using a high-protein brand like King Arthur for the best chew and rise. Bread flour can be used for a denser roll, but all-purpose gives that classic fluffy bakery feel. Make sure it is sifted if it is lumpy.
- Instant Yeast (2 ½ teaspoons): Using instant yeast speeds up the process significantly. You do not need to proof it in water first. Just mix it directly with the dry ingredients. Active dry yeast works too, but you will need to let it sit in warm milk for 5-10 minutes before adding. I prefer instant for convenience.
- Whole Milk (1 ½ cups): Warm milk activates the yeast and adds richness to the crumb. Whole milk is preferred for its fat content, which keeps the rolls tender. If you are lactose intolerant, oat milk or almond milk work well as substitutes.
- Unsalted Butter (6 tablespoons): Divided use. Half goes into the dough for richness, and half is melted for the filling. Use high-quality butter. The flavor of the filling depends heavily on the butter quality. Salted butter can be used, but reduce the added salt in the dough.
- Granulated Sugar (½ cup): Added to the dough to feed the yeast and add slight sweetness. Also used in the filling for that caramelized crunch. Brown sugar can be used in the filling for a deeper molasses flavor, which pairs beautifully with cinnamon.
- Eggs (2 large): Room temperature eggs incorporate better into the dough. They provide structure and help the rolls rise properly. Do not skip this; eggs are crucial for the fluffy texture.
- Salt (1 teaspoon): Essential for balancing the sweetness. It also strengthens the gluten structure. Use fine sea salt for even distribution.
- Ground Cinnamon (3-4 tablespoons): Do not use old cinnamon. Fresh, high-quality cinnamon makes a massive difference. If your spice jar has been sitting since last year, replace it. You want that potent, spicy aroma.
- Heavy Cream (for glaze): Used to thin the powdered sugar glaze. It adds a silky smooth texture. Half-and-half or whole milk can work, but heavy cream gives the most luxurious finish.
- Powdered Sugar (1 ½ cups): The base for the glaze. Sift it to avoid lumps. This creates the classic sweet coating that drips down the sides of the warm rolls.
For the best texture, I recommend sourcing your flour from a local mill if possible, or a trusted national brand. The moisture content in flour can vary by brand, so keep an eye on the dough consistency. It should be tacky but not sticky. If it sticks to your hands, add a sprinkle more flour. If it cracks, add a splash more milk.
Equipment Needed
You do not need a lot of fancy gear to make these, but having the right tools makes the process smoother. The most important item is, of course, your Blackstone griddle. A 28-inch or 36-inch model is ideal because you need space to roll out the dough and fit multiple rolls at once. If you have a smaller 22-inch model, you may need to cook in batches.
A large rolling pin is essential. A wooden French rolling pin works well because it has no handles, giving you better control and leverage. You need to roll the dough out evenly to ensure uniform cooking. A silicone mat or a lightly floured surface is helpful for rolling without sticking. Avoid using too much extra flour, as this can dry out the edges of your rolls.
A bench scraper is incredibly useful for cutting the dough into even sections. It keeps your hands clean and ensures precise cuts. A pastry brush is needed for brushing melted butter on the dough before adding the cinnamon mixture. A small offset spatula is handy for spreading the glaze evenly over the warm rolls after cooking.
For mixing the dough, a stand mixer with a dough hook is the easiest option. However, you can also mix by hand. A large mixing bowl and a sturdy spoon or your hands will work. If you mix by hand, expect to knead for about 10-15 minutes until the dough is smooth and elastic. It is a good arm workout.
Lastly, have a pair of tongs ready for flipping or moving the rolls if needed. And don’t forget a ladle or small pitcher for pouring the glaze. It gives you more control than dipping a spoon into a bowl. These tools are likely already in your kitchen or on your griddle station. Keeping them organized will help you work efficiently while the dough is rising.
Preparation Method
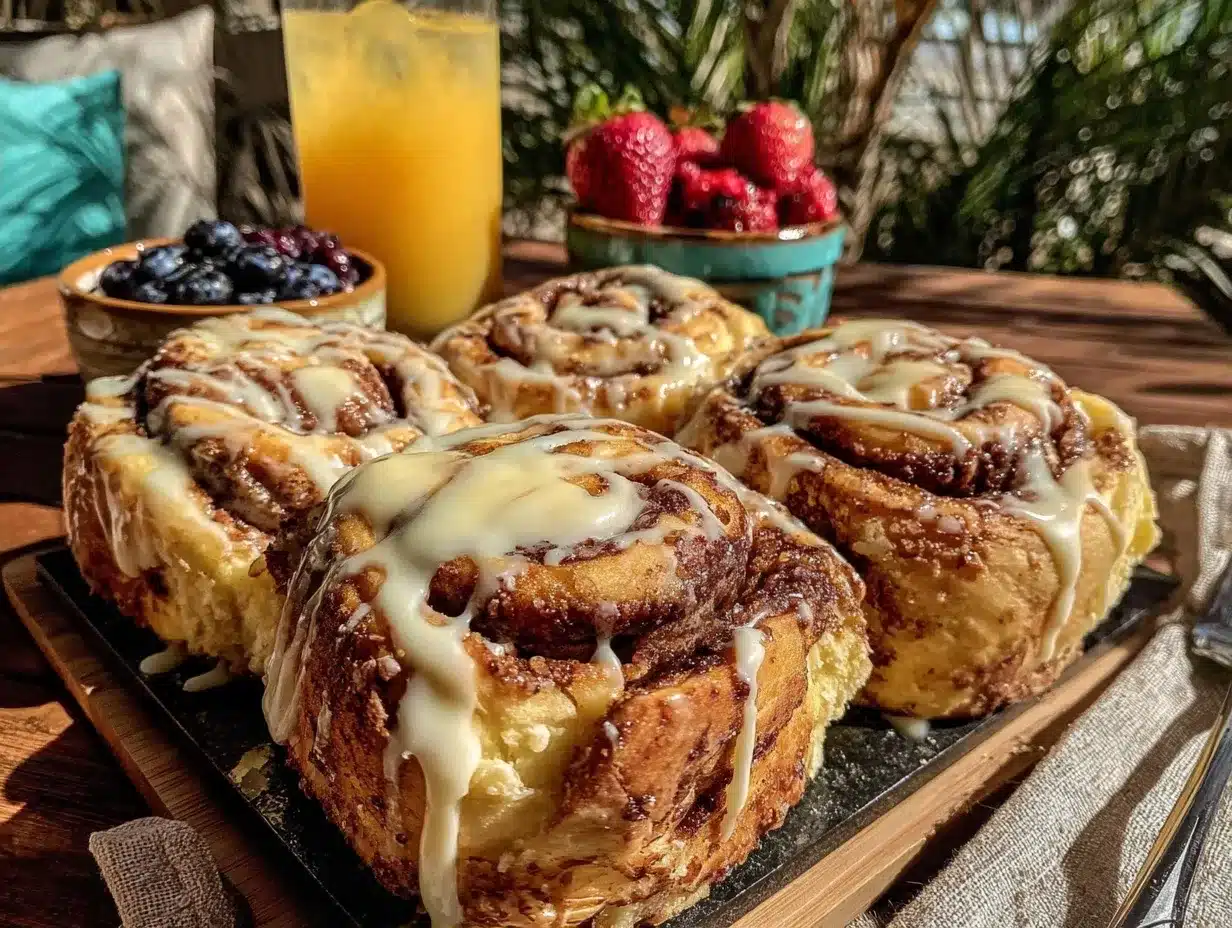
- Mix the Dough (10 minutes): In the bowl of a stand mixer, combine the flour, instant yeast, sugar, and salt. Whisk these dry ingredients together to ensure even distribution. In a separate container, whisk the warm milk, melted butter, and eggs until well combined. Pour the wet mixture into the dry ingredients. Attach the dough hook and mix on low speed for 2 minutes. Then, increase to medium speed and knead for 5-7 minutes. The dough should pull away from the sides of the bowl and form a smooth, slightly tacky ball. If it is too sticky, add flour one tablespoon at a time. If it is too dry, add milk one tablespoon at a time.
- First Rise (1 hour): Lightly grease a large bowl with oil or cooking spray. Place the dough inside and turn it once to coat the top. Cover the bowl tightly with plastic wrap or a damp kitchen towel. Let it rise in a warm, draft-free area for about 1 hour, or until it has doubled in size. You do not need to wait for it to double exactly; a slight puff is fine if you are short on time, but the texture will be better if it fully rises. This step develops the gluten and creates the air pockets that make the rolls fluffy.
- Prepare the Filling (5 minutes): While the dough is rising, mix the cinnamon and brown sugar in a small bowl. If using granulated sugar, mix it with the cinnamon now. Melt the remaining 6 tablespoons of butter. Set these aside. Having your filling ready before you roll out the dough saves time and prevents the dough from over-proofing while you work.
- Roll and Shape (10 minutes): Lightly flour a clean work surface. Turn the risen dough out onto the surface. Gently press it down to release any large air bubbles. Roll the dough into a large rectangle, approximately 12×18 inches. The thickness should be about ¼ inch. Spread the melted butter evenly over the entire surface, leaving a small border at the far edge. Sprinkle the cinnamon-sugar mixture evenly over the butter. Starting from the long edge closest to you, tightly roll the dough up into a log. Pinch the seam to seal it. Then, pinch the ends to seal any gaps.
- Cut the Rolls (5 minutes): Using a sharp knife or dental floss, cut the log into 12 equal pieces. Dental floss works wonders for clean cuts without squishing the dough. Slide the rolls onto a parchment-lined baking sheet or directly onto a lightly oiled plate. Cover them loosely with a towel and let them rest for 15-20 minutes. This second rise helps them puff up before hitting the heat.
- Heat the Griddle (5 minutes): Preheat your Blackstone griddle to medium-low heat, around 300°F to 325°F. You want a consistent, moderate heat. Too hot, and the bottoms will burn before the centers cook. Too cool, and the rolls will be dense. Spray the griddle with a non-stick cooking spray or brush with a thin layer of oil.
- Cook the Rolls (15-20 minutes): Place the rolls on the griddle, leaving space between them for expansion. Cover the griddle with a dome or a large lid if you have one. This traps steam and helps the tops cook. Cook for 8-10 minutes, then carefully flip the rolls if they are browning too quickly on the bottom. Actually, for this recipe, it is often better not to flip. Instead, cover tightly to steam the tops. Cook for another 7-10 minutes until the bottoms are golden brown and the centers are cooked through. You can test doneness by inserting a toothpick; it should come out clean.
- Glaze and Serve (5 minutes): While the rolls cook, whisk the powdered sugar and heavy cream together to form a smooth glaze. Once the rolls are done, remove them from the griddle and place them on a serving platter. Immediately drizzle the warm glaze over the hot rolls. The heat will melt the glaze slightly, creating a delicious coating. Serve warm.
Pay attention to the smell. When the cinnamon starts to scent the air, you are getting close. The visual cue is key. Look for a golden-brown color on the bottom. If the bottoms are dark but the tops are pale, lower the heat and cover longer. Patience is the secret ingredient here.
Cooking Tips & Techniques
One of the biggest mistakes people make is setting the heat too high. Cast iron retains heat incredibly well. If you crank it up, you will get charred bottoms and raw middles. Start low and slow. You can always increase the heat slightly, but you cannot undo burnt dough. I usually start at 300°F and adjust based on how the first batch cooks.
Another common error is rolling the dough too thin. If the dough is less than ¼ inch thick, the rolls will be dense and flat. You want some thickness to create that fluffy, cloud-like interior. Roll it out evenly. Uneven thickness leads to uneven cooking. Use a ruler if you are being precise, but your eyes are usually good enough.
Sealing the roll is critical. If you do not pinch the seam tightly, the filling will spill out during cooking. This creates a mess on your griddle and results in dry spots on the rolls. Take your time with the rolling technique. Roll tightly, like a sleeping bag. Then pinch the seam firmly.
Using a cover is a game-changer. The Blackstone does not have an enclosed oven environment. The tops of the rolls can stay doughy if you do not trap the steam. A metal dome, a large baking sheet placed over the rolls, or even a large pot lid can work. This mimics the oven environment and ensures the tops cook through. Without a cover, you may need to flip the rolls, which can break their shape.
Don’t skip the second rise. After cutting, letting the rolls rest for 15-20 minutes allows the yeast to activate one last time. This results in a lighter, airier texture. If you are in a rush, you can skip this, but the texture will be denser. It is worth the wait.
Keep your workspace clean. Flour everywhere makes a mess and can affect the final texture. Wipe down your rolling pin and surface frequently. Have all your ingredients measured and ready before you start rolling. This is a process that flows best when you are organized. Multitasking here can lead to mishaps.
Finally, do not overwork the dough. Once it comes together, stop mixing. Over-kneading can make the rolls tough. You want a tender crumb. Handle the dough gently when shaping it. Rough handling deflates the air bubbles you worked so hard to create. Treat the dough with care, and it will reward you with softness.
Variations & Adaptations
While the classic cinnamon roll is timeless, there are many ways to tweak this recipe to suit your taste or dietary needs. The base dough is very forgiving. Here are a few ideas to try.
Chocolate Chip Cinnamon Rolls: Add a handful of chocolate chips to the filling before rolling. The chocolate melts into the cinnamon sugar, creating pockets of gooey sweetness. This is a huge hit with kids. Use semi-sweet or dark chocolate chips for a less sugary option.
Pecan Praline Rolls: Sprinkle chopped pecans over the butter before adding the cinnamon sugar. After cooking, drizzle with a caramel sauce made from brown sugar, butter, and cream. This adds a crunchy texture and a rich, nutty flavor. It feels like a dessert from a high-end restaurant.
Gluten-Free Option: You can substitute the all-purpose flour with a 1-to-1 gluten-free flour blend. Look for a blend that contains xanthan gum. The dough may be slightly stickier, so you might need to adjust the liquid content slightly. The texture will be a bit more cake-like, but still delicious.
Vegan Adaptation: Use plant-based milk and butter. Replace the eggs with flax eggs (1 tablespoon ground flaxseed mixed with 3 tablespoons water per egg). The dough may not rise as much, but the flavor remains strong. Use maple syrup instead of sugar in the filling for a natural sweetener.
Mini Rolls: Instead of cutting 12 large rolls, cut 24 smaller ones. These are perfect for parties or for people who want a lighter breakfast portion. They cook faster, so keep an eye on the griddle. They are great for finger food snacking.
I personally love adding a layer of cream cheese to the filling. Mix softened cream cheese with a little sugar and spread it over the butter before adding the cinnamon. It adds a tangy richness that balances the sweetness. It is a bit more work, but the flavor complexity is worth it.
Serving & Storage Suggestions
These rolls are best served warm, right off the griddle. The contrast between the warm, soft dough and the cool, sweet glaze is the ideal experience. Serve them on a nice platter with extra glaze on the side for dipping. They pair beautifully with a strong cup of coffee or a glass of cold milk. For a savory balance, serve them alongside scrambled eggs or bacon.
If you have leftovers, store them in an airtight container at room temperature for up to 2 days. The glaze will soften, but the rolls will remain moist. For longer storage, freeze the unglazed rolls in a sealed container for up to 3 months. Thaw them at room temperature and reheat in the microwave for 30 seconds before glazing.
To reheat, you can use the griddle again. Place the cold roll on the warm griddle for 1-2 minutes on each side. This restores the soft texture and warms the filling. Avoid using the oven, as it can dry them out. The griddle is the best tool for reheating baked goods.
The flavors develop over time. The cinnamon and sugar meld together, making the rolls taste even more cohesive the next day. However, the glaze is best applied fresh. If you store them glazed, the glaze may become sticky or absorb into the dough. It is better to glaze just before serving.
For presentation, dust the tops with powdered sugar after glazing. Add a sprinkle of chopped pecans or a drizzle of extra caramel for a fancy touch. They look impressive on a brunch table and are sure to draw compliments. Enjoy them slowly and savor the moment.
Nutritional Information & Benefits
While these are definitely a treat, they can fit into a balanced diet. One roll contains approximately 250-300 calories, depending on the size and glaze amount. The dough provides carbohydrates for energy, while the butter and eggs offer protein and fat for satiety. Cinnamon has anti-inflammatory properties and can help regulate blood sugar levels, which is a nice bonus.
If you are watching your sugar intake, you can reduce the sugar in the dough and filling by half. Use a sugar substitute in the glaze. The flavor will still be good, just less sweet. For a lower-calorie option, skip the heavy cream glaze and use a light yogurt drizzle. It adds tang and creaminess with fewer calories.
These rolls are naturally gluten-free if you use the right flour, making them accessible for those with celiac disease or gluten sensitivity. They are also easy to make vegan. The flexibility of the recipe allows for various dietary adaptations. Enjoy them as a special weekend breakfast or a holiday treat. Moderation is key, but there is no guilt in baking something delicious from scratch.
Conclusion
Making Fluffy Blackstone Cinnamon Rolls is more than just cooking; it is an experience. It connects you to the outdoors, to the warmth of cast iron, and to the joy of baking from scratch. I hope this recipe brings you as much happiness as it has brought me. The process is simple, but the results are extraordinary. You will not believe how good they taste.
I encourage you to try this recipe and make it your own. Add your favorite fillings, experiment with spices, or share them with friends and family. Cooking is better when it is shared. I would love to hear how they turn out for you. Leave a comment below with your variations and tips.
Thank you for joining me on this culinary adventure. Happy griddling, and enjoy every bite of your homemade cinnamon rolls. They are worth every minute of effort.
Frequently Asked Questions
Can I make the dough the night before?
Yes, you can mix the dough and let it rise in the refrigerator overnight. This slow rise develops more flavor. When you are ready to cook, let the dough come to room temperature for about an hour before rolling it out. This makes it easier to work with.
Why are my rolls dense?
Dense rolls are usually caused by over-kneading, under-proofing, or rolling the dough too thin. Ensure you are kneading just until smooth. Let the dough rise until it is puffy. Roll it to a consistent ¼ inch thickness. Also, check your yeast expiration date to ensure it is active.
Can I use active dry yeast instead of instant?
Absolutely. Just dissolve the active dry yeast in the warm milk with a teaspoon of sugar and let it sit for 5-10 minutes until foamy. Then proceed with the recipe as written. The rise time may be slightly longer.
How do I prevent the filling from leaking out?
Roll the dough tightly and pinch the seam securely. Make sure you do not add too much filling, which can cause overflow. Also, avoid cutting the rolls too close to the edge of the dough when shaping the log.
What is the best way to store leftover glaze?
Store any extra glaze in a small jar in the refrigerator for up to a week. Reheat it slightly in the microwave to thin it out before using. It will thicken as it cools, so you may need to add a drop of milk to get the right consistency.
Pin This Recipe!
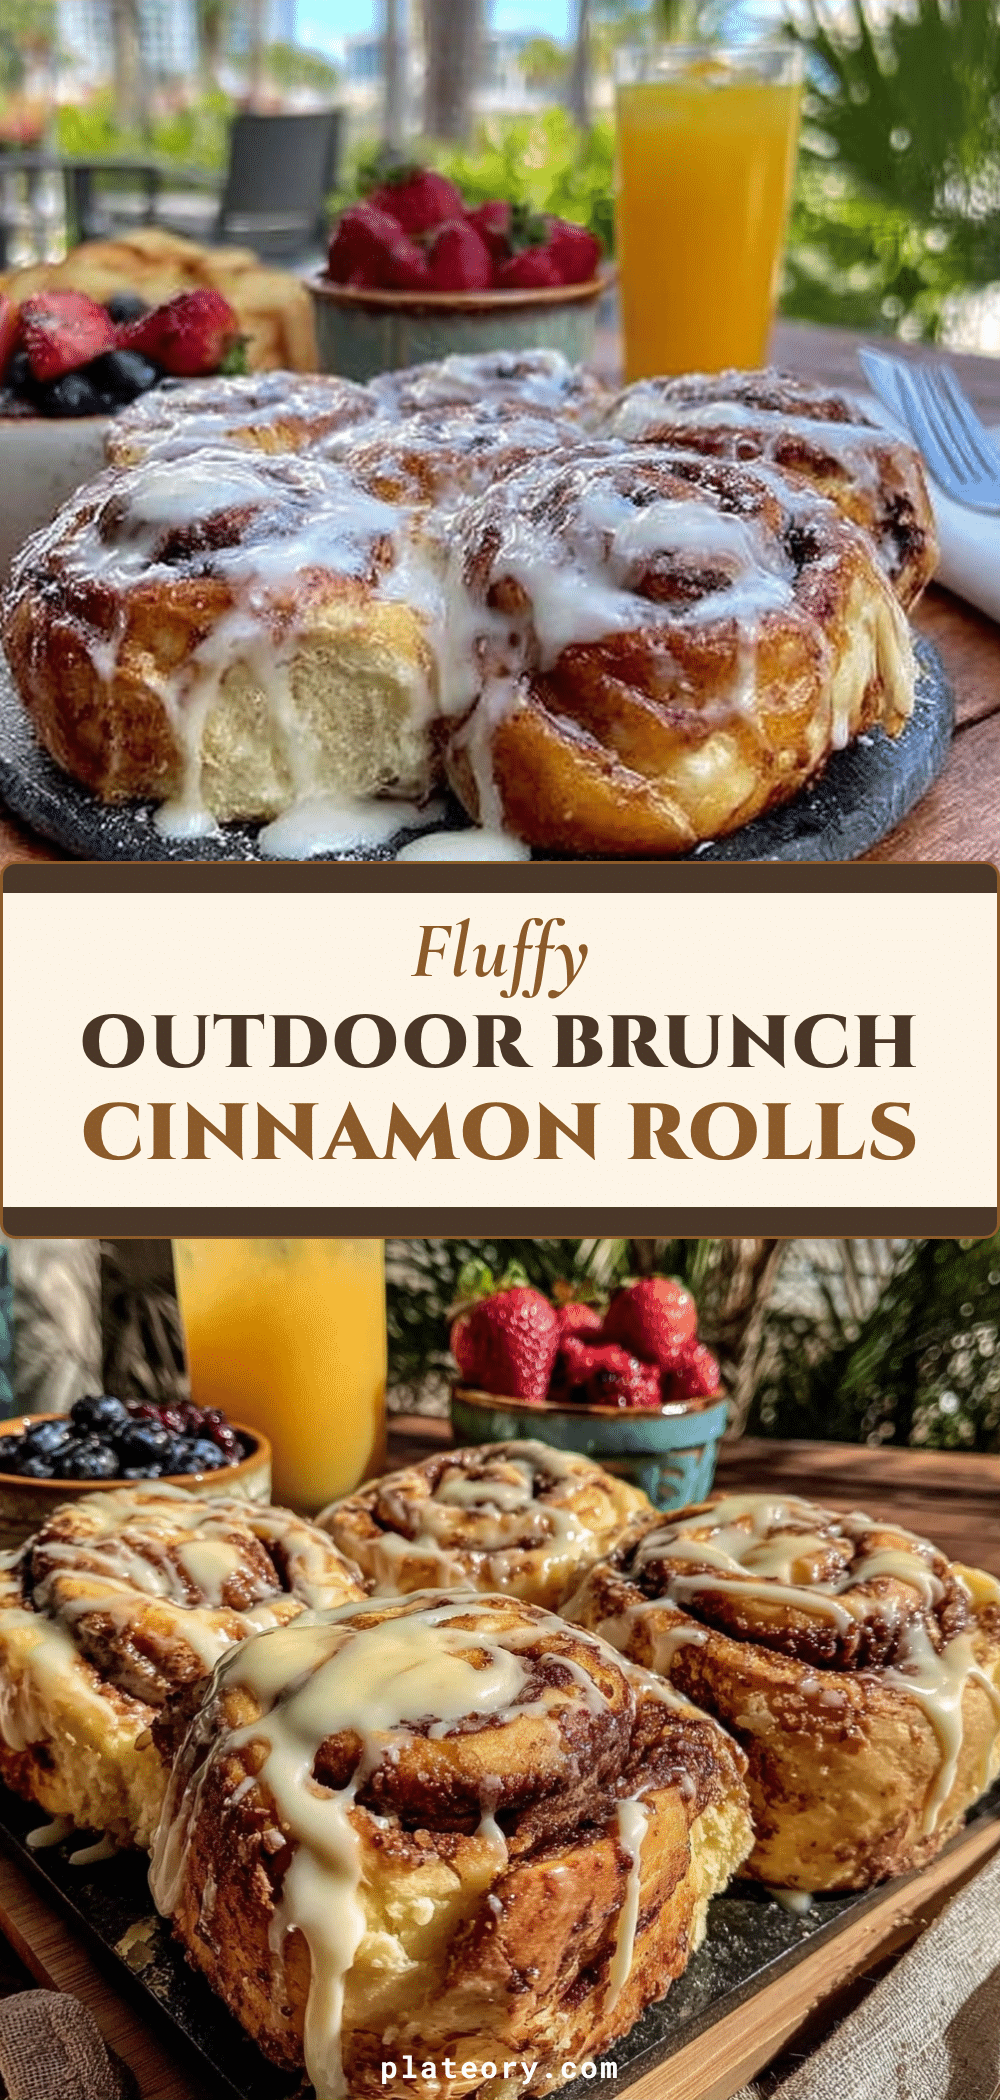

Fluffy Blackstone Cinnamon Rolls: Perfect Griddle Breakfast
- Total Time: 50 minutes
- Yield: 12 servings 1x
Description
These griddle-baked cinnamon rolls offer crispy, buttery edges and a pillowy soft center, providing a faster, outdoor-friendly alternative to traditional oven-baked rolls with unique caramelized flavor.
Ingredients
- 4 ½ cups All-Purpose Flour
- 2 ½ teaspoons Instant Yeast
- 1 ½ cups Whole Milk (warm)
- 6 tablespoons Unsalted Butter (divided)
- ½ cup Granulated Sugar
- 2 large Eggs (room temperature)
- 1 teaspoon Salt
- 3–4 tablespoons Ground Cinnamon
- 1 ½ cups Powdered Sugar (for glaze)
- Heavy Cream (for glaze)
- Brown Sugar (optional, for filling)
- Non-stick cooking spray or oil (for griddle)
Instructions
- Mix the dough: In a stand mixer, combine flour, yeast, sugar, and salt. Whisk warm milk, melted butter, and eggs, then pour into dry ingredients. Knead on medium speed for 5-7 minutes until smooth and tacky.
- First Rise: Place dough in a greased bowl, cover, and let rise in a warm area for about 1 hour or until doubled in size.
- Prepare Filling: Mix cinnamon and brown sugar (if using). Melt the remaining 6 tablespoons of butter.
- Roll and Shape: Roll dough into a 12×18 inch rectangle (¼ inch thick). Spread melted butter over the surface, leaving a border. Sprinkle with cinnamon-sugar mixture. Roll tightly into a log and pinch the seam to seal.
- Cut the Rolls: Cut the log into 12 equal pieces. Place on a lined sheet, cover loosely, and let rest for 15-20 minutes.
- Heat Griddle: Preheat Blackstone griddle to medium-low (300°F-325°F). Lightly oil or spray the surface.
- Cook: Place rolls on the griddle. Cover with a dome or lid to trap steam. Cook for 8-10 minutes, then cover again for another 7-10 minutes until golden brown and cooked through. Avoid flipping if possible to maintain shape.
- Glaze and Serve: Whisk powdered sugar and heavy cream to make glaze. Drizzle over warm rolls immediately after removing from griddle. Serve warm.
Notes
Ensure the griddle heat is not too high to prevent burning the bottoms before the centers cook. Using a cover is essential to steam the tops. For best texture, do not roll the dough thinner than ¼ inch. The dough can be prepared the night before and refrigerated for a slow rise.
- Prep Time: 30 minutes
- Cook Time: 20 minutes
- Category: Breakfast
- Cuisine: American
Nutrition
- Serving Size: 1 large roll
- Calories: 275
- Sugar: 22
- Sodium: 250
- Fat: 12
- Saturated Fat: 7
- Carbohydrates: 38
- Fiber: 1
- Protein: 5
Keywords: Blackstone, cinnamon rolls, griddle breakfast, outdoor cooking, yeast dough, fluffy rolls, cast iron breakfast