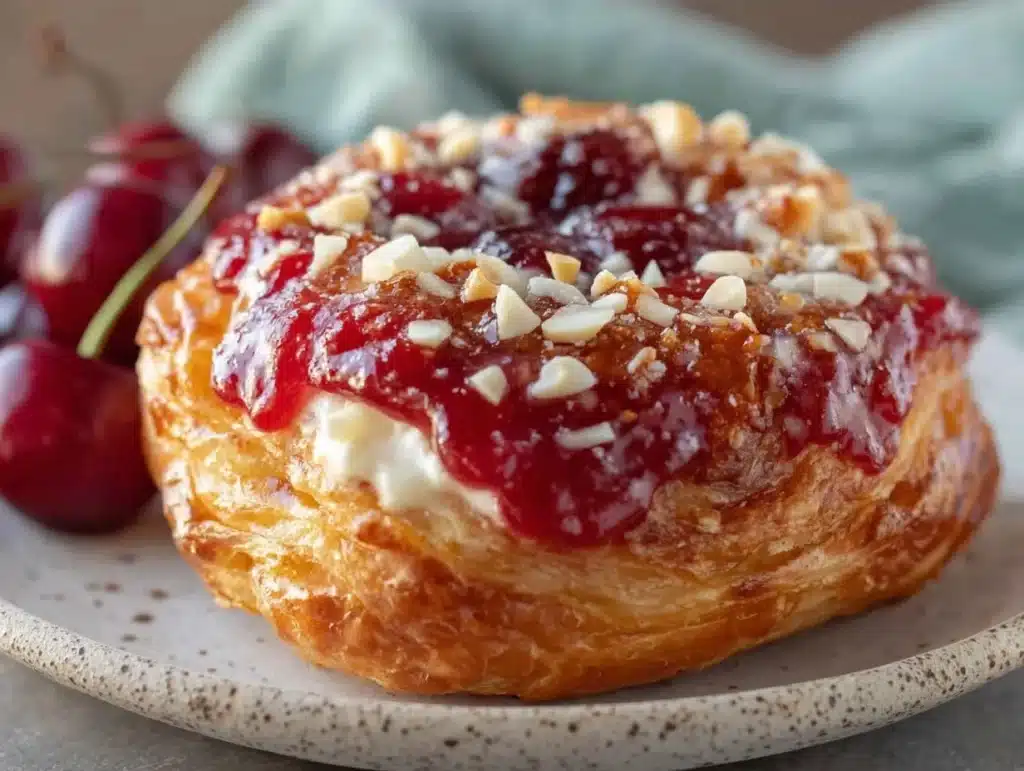
I still remember the humid air of my first trip to Maui, standing on a lanai that smelled of plumeria and salt. It was there, over a plate of flaky, sweet pastries, that I discovered what I now call the ultimate comfort treat. These aren’t your typical, dense, buttery Danish from a coffee shop chain. They are light, airy, and surprisingly easy to make at home. Honestly, I was skeptical about calling them “Danishes” because they don’t fit the traditional laminated dough mold. But let’s face it, if it tastes this good, does the name even matter?
The smell of warm cream cheese and tart cherries baking in a golden crust takes me right back to those vacation mornings. I’ve tested this creamy cherry Hawaiian danish recipe over a dozen times to get the balance of sweet and tart just right. It’s become my go-to weekend breakfast, especially when I want something that feels indulgent but doesn’t require hours of folding dough. You know how it is when you’re craving something fancy but only have thirty minutes? This is your answer.
What makes this recipe special is the simplicity. You use store-bought puff pastry or crescent rolls to mimic that flaky texture without the hassle. The filling is rich and tangy, cutting through the sweetness of the cherries perfectly. Whether you are feeding a picky crew of kids or hosting a brunch for friends, this dish delivers. It’s a little piece of island sunshine in every bite. Plus, the vibrant red color looks stunning on any table, making it perfect for sharing on social media or just enjoying with your morning coffee.
Why You’ll Love This Recipe
After years of experimenting with breakfast pastries, I can confidently say this creamy cherry Hawaiian danish recipe stands out for all the right reasons. It’s not just about the taste, though the flavor profile is undeniable. It’s about the experience of making it and the joy of eating it. I’ve tried countless variations of fruit-filled pastries, and this one strikes the perfect balance between convenience and gourmet quality. Here is why this recipe has earned a permanent spot in my kitchen rotation.
- Quick & Easy: You can have these in the oven in under 20 minutes of prep time. If you are using crescent rolls, it’s even faster. This is perfect for busy weeknights or when you wake up with a sudden craving for something sweet.
- Simple Ingredients: No fancy grocery trips needed. You likely already have cream cheese, cherries, and pastry dough in your fridge or pantry. It’s a great way to use up those leftover cherries from a can or jar.
- Perfect for Brunch: These are ideal for weekend brunches or holiday mornings. They look elegant enough for guests but are simple enough for a casual family meal.
- Crowd-Pleaser: Kids love the sweet cherry filling, and adults appreciate the tangy cream cheese contrast. It’s a flavor combination that appeals to almost everyone.
- Unbelievably Delicious: The texture is next-level. The pastry gets crispy and golden while the filling stays warm and gooey. It’s comfort food reimagined—lighter than a traditional Danish but just as satisfying.
What makes this recipe different is the Hawaiian twist. Instead of heavy, dense dough, we lean into the light, airy texture of puff pastry or crescent dough. This creates a delicate vessel for the rich filling. I also add a touch of vanilla to the cream cheese, which enhances the tropical vibe. It’s the kind of pastry that makes you close your eyes after the first bite. It’s not just breakfast; it’s a small vacation for your taste buds.
What Ingredients You Will Need
This recipe relies on high-quality, simple ingredients to deliver bold flavor and satisfying texture. The key is letting the quality of the cherries and the cream cheese shine. I prefer using small-curd cottage cheese for a lighter texture if you want to swap some of the cream cheese, but for this specific creamy cherry Hawaiian danish recipe, full-fat cream cheese is the way to go for that rich, smooth filling.
- Puff Pastry or Crescent Rolls: One package of thawed puff pastry or two cans of crescent rolls. Puff pastry gives a more professional, flaky result, while crescent rolls are softer and easier for beginners. I recommend using a brand like Pepperidge Farm for puff pastry for consistent layers.
- Cream Cheese: 8 ounces of full-fat cream cheese, softened. This is the base of your filling. Make sure it’s room temperature so it mixes smoothly without lumps.
- Sugar: 1/4 cup of granulated sugar. You can adjust this based on how sweet your cherries are. If using sweetened cherries, you might reduce this slightly.
- Vanilla Extract: 1 teaspoon of pure vanilla extract. This adds warmth and depth to the creamy filling, balancing the tartness of the fruit.
- Cherry Filling: 1 cup of cherry pie filling or drained canned cherries. Cherry pie filling is easier and sweeter, while drained cherries give you more control over the texture. If you use fresh cherries, pit them and toss them with a little sugar and cornstarch.
- Egg Wash: One large egg beaten with 1 tablespoon of water. This helps the pastry turn golden brown and gives it a shiny finish.
- Powdered Sugar: Optional, for dusting on top. This adds a touch of sweetness and makes them look fancy.
- Almond Extract: A few drops of almond extract. This is my secret ingredient. It enhances the cherry flavor and adds a subtle nutty aroma that reminds me of macaroons.
If you need to substitute ingredients, you can use dairy-free cream cheese for a vegan option, though the texture will be slightly different. For a gluten-free version, use gluten-free puff pastry. I always suggest looking for bright red, plump cherries if you are using fresh fruit, as they tend to have better flavor.
Is the filling too runny?
If you find your cherry filling is too watery, add a teaspoon of cornstarch to the cream cheese mixture. This will help thicken it up as it bakes, preventing the pastry from getting soggy.
Equipment Needed
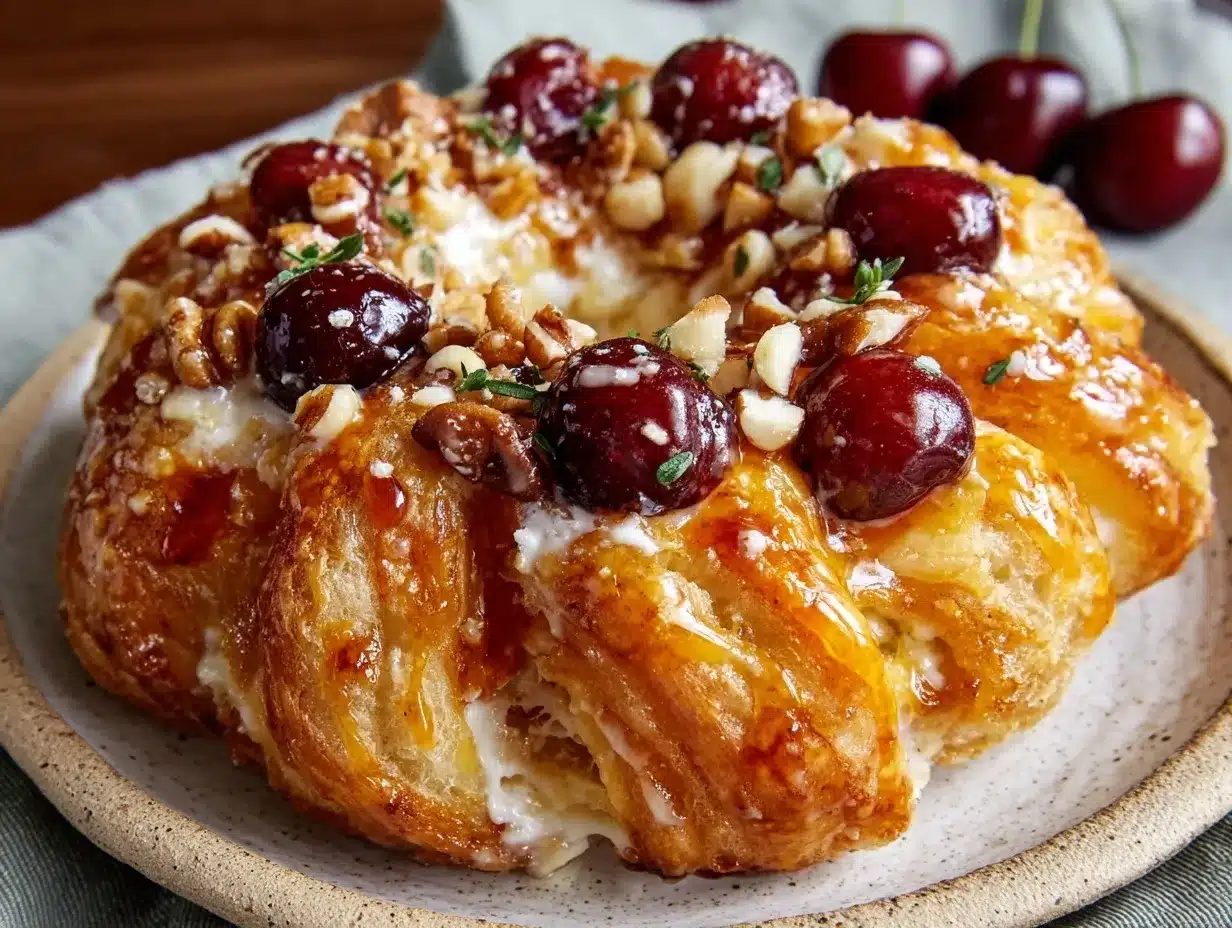
You don’t need a lot of fancy gadgets to make these creamy cherry Hawaiian danishes. Most of the equipment is standard kitchen fare. The most important tool is a good baking sheet. I use a heavy-gauge aluminum baking sheet because it distributes heat evenly, preventing hot spots that can burn the pastry. A dark non-stick pan works too, but you might need to reduce the oven temperature by 25 degrees Fahrenheit to avoid over-browning.
A silicone baking mat is a great alternative to parchment paper. It’s reusable and provides excellent non-stick properties. I’ve found that parchment paper can sometimes slide around, especially when you are piping filling, whereas a silicone mat stays put. If you don’t have one, parchment paper works perfectly fine.
You’ll also need a mixing bowl and an electric mixer or a sturdy fork. For mixing the cream cheese, an electric hand mixer ensures a smooth, lump-free filling. If you don’t have one, a fork works, but you’ll need to soften the cream cheese thoroughly. A small offset spatula is helpful for spreading the filling evenly onto the pastry without tearing it.
For the egg wash, a small bowl and a pastry brush are needed. A silicone brush is easier to clean than a traditional bristle brush. Finally, a cooling rack is essential. Letting the danishes cool on the rack prevents the bottoms from getting soggy from trapped steam. It’s a small step that makes a big difference in texture.
Preparation Method
Getting started with this creamy cherry Hawaiian danish recipe is straightforward, but attention to detail ensures the best results. First, preheat your oven to 375°F (190°C). Line your baking sheet with parchment paper or a silicone mat. This step is crucial to prevent sticking and ensures easy cleanup.
- Prepare the Filling: In a medium mixing bowl, combine the softened cream cheese, sugar, vanilla extract, and almond extract. Use an electric mixer on medium speed to beat until smooth and creamy. This should take about 2-3 minutes. Scrape down the sides of the bowl to ensure everything is well incorporated. The mixture should be thick and spreadable. If it feels too stiff, add a teaspoon of milk. If it’s too runny, chill it in the fridge for 10 minutes.
- Prepare the Pastry: If using puff pastry, thaw it according to package instructions. Roll it out slightly on a floured surface to smooth out any creases. Cut the pastry into squares, about 4×4 inches. If using crescent rolls, unroll the dough and separate it into triangles. Press the seams together firmly to prevent the filling from leaking.
- Assemble the Danishes: Place the pastry squares or triangles on the prepared baking sheet. Spoon a generous tablespoon of the cream cheese mixture onto the center of each piece. Spread it out, leaving a 1-inch border around the edges. This border is important for sealing the pastry later.
- Add the Cherries: Top the cream cheese layer with a spoonful of cherry filling. Use about 1-2 tablespoons per danish. Be careful not to overfill, as the cherries will expand slightly during baking. If using fresh cherries, chop them into smaller pieces to fit better.
- Shape the Danishes: For square puff pastry, fold the corners into the center, overlapping them slightly to create a rustic, open-faced look. For crescent rolls, you can roll them up from the wide end to the point, or fold the sides over the filling to create a pocket. Press the edges gently to seal.
- Apply Egg Wash: Brush the exposed pastry edges with the egg wash. This will give them a beautiful golden-brown color. Be careful not to get egg wash on the filling, as it can prevent the cherries from bubbling up nicely.
- Bake: Bake in the preheated oven for 15-18 minutes, or until the pastry is puffed and golden brown. Keep an eye on them during the last few minutes, as oven temperatures can vary. The danishes are done when the pastry is crisp and the filling is hot.
- Cool and Serve: Remove from the oven and let them cool on the baking sheet for 5 minutes. Then transfer to a wire rack to cool completely or serve warm. Dust with powdered sugar if desired.
One personal tip: if you are using crescent rolls, make sure to press the perforated seams together tightly. If they don’t seal, the cherry filling can leak out and burn on the baking sheet, creating smoke and a mess.
Cooking Tips & Techniques
Mastering these creamy cherry Hawaiian danishes comes down to a few key techniques. First, temperature control is everything. Your cream cheese must be fully softened. If it’s cold, you’ll get lumps in your filling, and it won’t spread evenly. I usually take it out of the fridge about 30 minutes before I start. If you’re in a hurry, you can microwave it in 5-second bursts, but be careful not to melt it.
Another common mistake is overfilling the danishes. It’s tempting to load them up with cherries, but the filling needs space to expand. If you overfill, the pastry will burst, and you’ll lose that beautiful presentation. Start with a modest amount of filling, and you can always add more cherries on top after baking if you want extra fruit.
Timing is also crucial. Watch the danishes closely in the last 5 minutes of baking. Puff pastry can go from golden to burnt very quickly. If the edges are browning too fast, you can tent them with aluminum foil. This allows the center to cook through without over-browning the outside.
For the best texture, let the danishes cool slightly before eating. The filling is extremely hot when it comes out of the oven, and biting into it immediately can be painful. Plus, the filling sets slightly as it cools, making it easier to handle. I always find that these taste even better the next day, as the flavors meld together overnight.
Variations & Adaptations
One of the best things about this recipe is how adaptable it is. You can easily modify it to suit different tastes or dietary needs. Here are a few variations I’ve tried with great success.
Blueberry Lemon: Swap the cherries for blueberry pie filling. Add a teaspoon of lemon zest to the cream cheese mixture for a bright, citrusy twist. This combination is classic and refreshing.
Raspberry White Chocolate: Use raspberry filling and fold white chocolate chips into the cream cheese. The tartness of the raspberries pairs beautifully with the sweet white chocolate.
Gluten-Free Option: Use gluten-free puff pastry or crescent rolls. Make sure to check the labels, as some brands may contain wheat starch. The filling remains the same, and the result is just as delicious.
Low-Sugar Version: Use unsweetened cherry pie filling or fresh cherries sweetened with a sugar substitute. Reduce the sugar in the cream cheese mixture or use a sugar-free cream cheese spread. This version is great for those watching their sugar intake.
Mini Appetizers: Cut the pastry into smaller squares and use a teaspoon of filling. These make perfect bite-sized appetizers for parties or potlucks. They cook faster, so check them after 10 minutes.
I once tried making these with a almond paste layer under the cream cheese, and it added a wonderful depth of flavor. It’s a bit more work, but worth it for special occasions. Feel free to experiment with different fruits and extracts to find your favorite combination.
Serving & Storage Suggestions
These creamy cherry Hawaiian danishes are best served warm or at room temperature. They pair wonderfully with a cup of black coffee or a glass of cold milk. For a more indulgent experience, serve them with a dollop of whipped cream or a scoop of vanilla ice cream. The contrast of hot pastry and cold cream is delightful.
If you have leftovers, store them in an airtight container in the refrigerator for up to 3 days. Reheat them in the oven at 350°F for 5-10 minutes to restore the crispiness. Avoid microwaving, as it can make the pastry soggy. You can also freeze the unbaked danishes. Place them on a baking sheet and freeze until solid, then transfer to a freezer bag. Bake directly from frozen, adding 2-3 minutes to the baking time.
The flavors develop nicely over time, so don’t be surprised if they taste even better on day two. The cream cheese filling becomes slightly denser, and the cherry flavor intensifies. Just make sure to reheat them properly to enjoy the best texture.
Nutritional Information & Benefits
While these danishes are a treat, they can fit into a balanced diet when enjoyed in moderation. Each danish contains approximately 250-300 calories, depending on the size and filling. The cream cheese provides protein and calcium, while the cherries offer antioxidants and vitamin C. If you use whole wheat pastry or crescent rolls, you can add some fiber to the mix.
For those with dietary restrictions, remember to check the labels of your pastry and filling. Many store-bought pastries contain gluten, and some cherry fillings are high in sugar. Using fresh cherries and homemade pastry allows you to control the ingredients better. Overall, this recipe is a delicious way to enjoy a sweet breakfast without feeling too guilty.
Conclusion
Making these creamy cherry Hawaiian danishes is a simple yet rewarding experience. They offer the perfect balance of flaky pastry, tangy cream cheese, and sweet cherries. I love how easy they are to make and how much everyone enjoys them. Whether you are a seasoned baker or a beginner, this recipe is accessible and delicious.
I encourage you to try this recipe and make it your own. Experiment with different fruits and extracts to find your favorite combination. Share your creations with friends and family, and let me know how they turn out in the comments below. I’d love to hear your thoughts and variations.
Thank you for joining me in the kitchen. Happy baking!
FAQs
Can I use fresh cherries instead of canned?
Yes, you can use fresh cherries. Pit them and toss them with a little sugar and cornstarch to thicken the juices. This will give you a fresher flavor and better texture.
What is the best type of cream cheese to use?
Full-fat cream cheese is recommended for the creamiest texture. Low-fat versions can make the filling watery and less rich.
Can I make these ahead of time?
Yes, you can assemble them the night before and refrigerate them. Bake them in the morning for a fresh, warm breakfast.
How do I prevent the pastry from getting soggy?
Make sure to leave a border around the filling and don’t overfill. Also, bake them on a preheated baking sheet if possible to ensure the bottom cooks quickly.
Can I freeze the baked danishes?
It’s better to freeze them unbaked. Baked danishes can become soggy when reheated after freezing. Freeze unbaked danishes and bake from frozen.
Pin This Recipe!


Creamy Cherry Hawaiian Danishes
- Total Time: 35-38 minutes
- Yield: 8-12 servings 1x
Description
Light, airy pastries made with store-bought puff pastry or crescent rolls, filled with a tangy cream cheese and cherry mixture. These easy-to-make danishes offer a tropical twist on a classic breakfast treat.
Ingredients
- 1 package thawed puff pastry OR 2 cans crescent rolls
- 8 ounces full-fat cream cheese, softened
- 1/4 cup granulated sugar
- 1 teaspoon pure vanilla extract
- A few drops almond extract
- 1 cup cherry pie filling OR drained canned cherries
- 1 large egg beaten with 1 tablespoon water (for egg wash)
- Powdered sugar, optional for dusting
Instructions
- Preheat oven to 375°F (190°C) and line a baking sheet with parchment paper or a silicone mat.
- In a medium mixing bowl, combine softened cream cheese, sugar, vanilla extract, and almond extract. Beat with an electric mixer until smooth and creamy (2-3 minutes).
- If using puff pastry, roll out and cut into 4×4 inch squares. If using crescent rolls, unroll and separate into triangles, pressing seams together.
- Place pastry on the prepared baking sheet. Spoon a generous tablespoon of the cream cheese mixture onto the center of each piece, leaving a 1-inch border.
- Top the cream cheese with 1-2 tablespoons of cherry filling.
- For puff pastry, fold corners into the center. For crescent rolls, roll up from the wide end or fold sides over filling. Press edges to seal.
- Brush exposed pastry edges with the egg wash.
- Bake for 15-18 minutes until pastry is puffed and golden brown.
- Cool on the baking sheet for 5 minutes, then transfer to a wire rack. Dust with powdered sugar if desired.
Notes
Ensure cream cheese is fully softened to avoid lumps. Do not overfill the danishes to prevent bursting. If using fresh cherries, toss with cornstarch to thicken juices. For best texture, let cool slightly before eating as the filling is very hot.
- Prep Time: 20 minutes
- Cook Time: 15-18 minutes
- Category: Breakfast
- Cuisine: Hawaiian
Nutrition
- Serving Size: 1 danish
- Calories: 250300
- Sugar: 20
- Sodium: 250
- Fat: 15
- Saturated Fat: 8
- Carbohydrates: 30
- Fiber: 1
- Protein: 5
Keywords: cherry danish, cream cheese pastry, easy breakfast, puff pastry recipe, crescent roll recipes, Hawaiian breakfast, brunch ideas