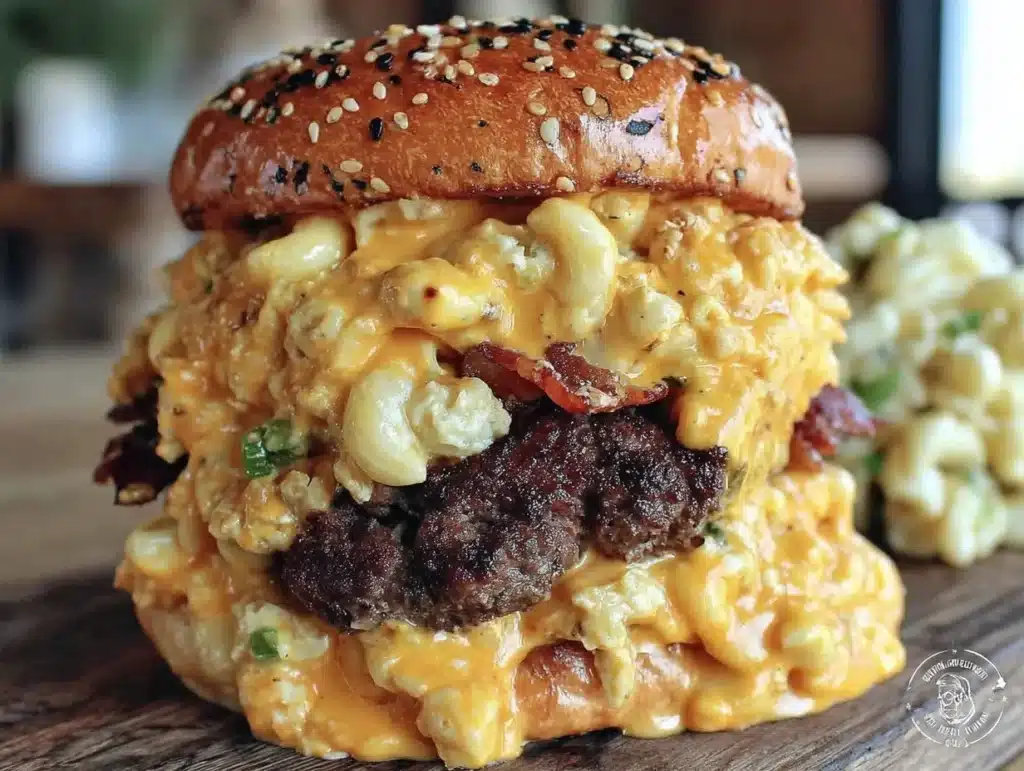
Let’s be honest for a second. I used to think a burger was just a burger. You get the bun, the patty, maybe some cheese, and you call it a day. But then I tried the cheesy mac and cheese stuffed burger, and my entire worldview shifted. It happened on a humid Tuesday in July, when the heat was rising off the asphalt and I was desperate for something that felt like comfort food but looked like a feast. I had leftover mac and cheese from dinner, and instead of putting it in the fridge, I had a crazy idea. Could I turn a side dish into the star of the main event?
I’ll admit, I was skeptical. Would it leak? Would it fall apart? Would it just be a weird mess? But honestly, the moment I took that first bite, the crunch of the crust giving way to the creamy, salty interior, I knew I was onto something big. This isn’t just a burger. It’s a culinary hug. It’s the kind of dish that makes your guests stop mid-chew and ask for the recipe before they’ve even finished chewing. I’ve tested this over a dozen times, tweaking the cheese blends and the beef ratios, and I’ve finally nailed the perfect balance. It’s messy, it’s indulgent, and it is absolutely worth every calorie.
If you are looking for a way to impress your neighbors or just treat yourself to something special, this recipe is your answer. The cheesy mac and cheese stuffed burger combines two American classics into one powerhouse bite. It’s perfect for summer cookouts, game day parties, or just when you need a serious mood booster. You don’t need to be a chef to make this work. You just need a little patience and a willingness to embrace the gooey goodness. Let’s get cooking.
Why You’ll Love This Recipe
There are a lot of stuffed burgers out there, but this one stands out for reasons that go beyond just the cheese pull. After testing dozens of variations, I’ve found that the key to success isn’t just the stuffing—it’s the technique. This recipe is designed to keep that molten center intact while still delivering a juicy, flavorful beef exterior. It’s not just about slapping a ball of pasta into a patty; it’s about creating a harmonious blend of textures and flavors that work together. Here is why this cheesy mac and cheese stuffed burger deserves a spot in your rotation.
- Quick & Easy Prep: While it sounds complex, the actual prep time is under 30 minutes if you have leftovers. If you’re making the mac from scratch, it takes about 45 minutes, but the effort is minimal. It’s perfect for busy weeknights or last-minute cravings when you want something gourmet without the stress.
- Simple Ingredients: You likely already have everything in your kitchen. Ground beef, elbow macaroni, cheddar cheese, milk, and butter. No fancy grocery trips needed. This is accessible comfort food that doesn’t require a specialty store run.
- Perfect for Cookouts: This is the ultimate crowd-pleaser for summer gatherings. It turns a standard backyard BBQ into a memorable event. Guests love the novelty, and kids love the familiarity of mac and cheese.
- Unbelievably Delicious: The texture combo is next-level. You get the charred, savory beef contrasted with the creamy, salty, and slightly sweet pasta. It’s comfort food reimagined—richer, faster, but with the same soul-soothing satisfaction.
- Customizable Base: While the classic cheddar version is my favorite, this technique allows for endless variations. You can swap the cheese, add spices, or even use different types of pasta. It’s your canvas.
What makes this recipe different from the rest is the attention to detail in the assembly. Many recipes fail because the stuffing leaks out or the burger becomes too large to handle. This method uses a specific folding technique that seals the cheese tight, ensuring every bite is packed with flavor. It’s the kind of recipe that makes you close your eyes after the first bite. It’s not just good; it’s memorable. Whether you’re impressing guests or just treating yourself, this burger delivers on all fronts.
What Ingredients You Will Need
This recipe relies on high-quality, wholesome ingredients to deliver bold flavor and satisfying texture without the fuss. The magic happens in the balance between the savory beef and the creamy, cheesy pasta. You don’t need anything exotic, but using good quality products makes a huge difference in the final result. Here is what you will need to make this cheesy mac and cheese stuffed burger shine.
- Ground Beef (80/20 blend): You need about 1 pound (450g) of ground beef. The 20% fat content is crucial for juiciness. Lean beef will result in a dry, tough burger. Look for fresh, bright red meat from your local butcher if possible.
- Elbow Macaroni: Use about 1 cup (200g) of dry elbow macaroni. Small pasta shapes hold the cheese sauce better than long noodles. Cook it al dente, as it will cook further in the oven or pan.
- Cheddar Cheese: 1 cup (100g) of sharp cheddar cheese, shredded. Avoid pre-shredded cheese as it contains anti-caking agents that prevent proper melting. Shred it yourself for the smoothest sauce.
- Mozzarella Cheese: ½ cup (50g) of low-moisture mozzarella, shredded. This provides the stretchy, gooey texture that makes the burger so irresistible.
- Butter: 2 tablespoons of unsalted butter. This adds richness to the mac and cheese and helps create a golden crust on the burger.
- Milk: ¼ cup (60ml) of whole milk. Whole milk creates a creamier sauce than skim milk. You can substitute with heavy cream for an even richer result.
- Garlic Powder: 1 teaspoon. This adds a subtle depth of flavor that complements the beef.
- Onion Powder: 1 teaspoon. Adds a savory backbone to the cheese sauce.
- Salt and Pepper: To taste. Season the beef generously, but be mindful of the salt in the cheese.
- Burger Buns: 4 sturdy buns, such as brioche or potato rolls. You need buns that can hold up to the weight and moisture of the stuffed patty without falling apart.
- Optional Toppings: Lettuce, tomato, pickles, or bacon. These add crunch and freshness to balance the richness.
I recommend using a brand like Cabot for cheddar cheese if you can find it; their sharp cheddar melts beautifully. For the beef, look for ground chuck that has been freshly ground. If you are making the mac from scratch, cook it in salted water like pasta, but rinse it briefly with cold water to stop the cooking process before mixing with the cheese sauce. This ensures the pasta doesn’t become mushy when the burger cooks.
Equipment Needed
You don’t need a lot of fancy tools to make this, but having the right equipment makes the process much smoother. Here is what you will need:
- Large Skillet or Cast Iron Pan: A cast iron skillet is ideal for searing the burgers and getting a nice crust. If you don’t have one, a heavy-bottomed non-stick skillet works well.
- Baking Sheet: You will need this to finish cooking the burgers in the oven if you prefer that method. Line it with parchment paper for easy cleanup.
- Mixing Bowls: One medium bowl for mixing the mac and cheese, and one larger bowl for the ground beef.
- Measuring Cups and Spoons: Precision matters, especially when dividing the meat and cheese evenly.
- Spatula: A sturdy, thin spatula is essential for flipping the burgers without breaking the seal.
- Instant-Read Thermometer: This is crucial for ensuring the beef is cooked safely without overcooking. You want an internal temperature of 160°F (71°C).
If you don’t have a baking sheet, you can finish the burgers in the skillet on low heat with a lid on. This steams the inside while the outside crisps. For budget-friendly options, a standard non-stick pan works, but you may need to use less oil to prevent sticking. Keep your tools clean and dry to ensure the best sear.
Preparation Method
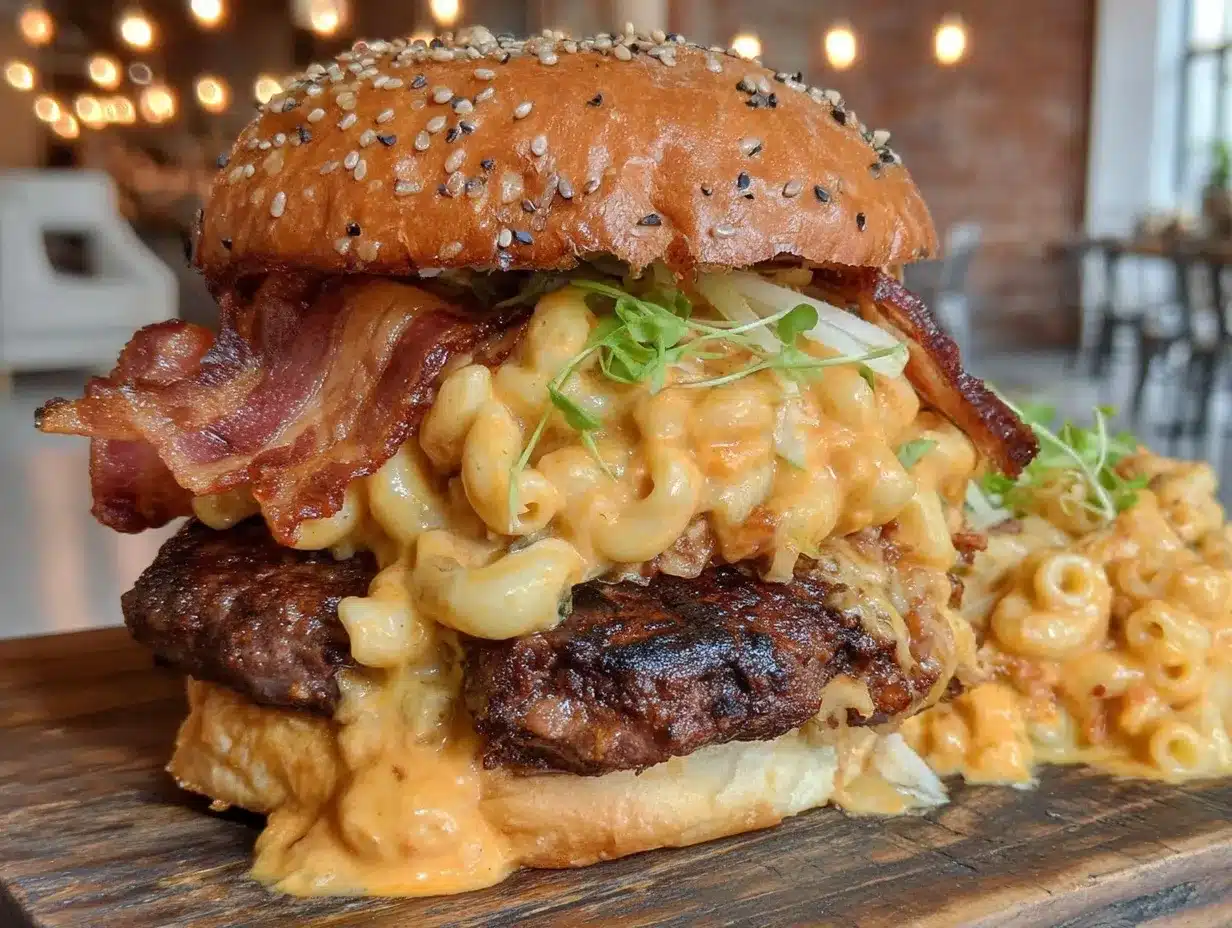
Making a cheesy mac and cheese stuffed burger might sound intimidating, but if you break it down into steps, it’s actually quite straightforward. The key is to prepare the components separately before assembling, and then handle the assembly with care. Here is how to do it right.
- Cook the Macaroni: Bring a large pot of salted water to a boil. Add the elbow macaroni and cook according to package directions, but reduce the time by 1-2 minutes. You want it al dente. Drain the pasta and rinse it under cold water to stop the cooking. Set aside to cool slightly. (Time: 10 minutes)
- Make the Cheese Sauce: In a small saucepan over low heat, melt the butter. Add the garlic powder and onion powder, stirring for 30 seconds until fragrant. Pour in the milk and stir to combine. Remove from heat and stir in the shredded cheddar and mozzarella cheese until melted and smooth. Season with a pinch of salt and pepper. (Time: 5 minutes)
- Combine Mac and Cheese: Add the cooked macaroni to the cheese sauce. Stir gently to coat every noodle. Spread the mixture onto a baking sheet or plate and let it cool completely. This step is critical; if the mac and cheese is warm, it will melt the beef and make it hard to handle. You can even put it in the fridge for 15 minutes to chill. (Time: 15 minutes)
- Prepare the Beef: Divide the ground beef into four equal portions (about 4 ounces or 110g each). Do not overwork the meat, as this can make the burgers tough. Gently form each portion into a flat, wide disc. The disc should be larger than your burger bun, as it will shrink during cooking. (Time: 5 minutes)
- Form the Mac and Cheese Balls: Take about ¼ cup of the cooled mac and cheese mixture and roll it into a ball. If the mixture is too sticky, wet your hands slightly. You should have four balls. (Time: 5 minutes)
- Stuff the Burgers: Place a mac and cheese ball in the center of each beef disc. Carefully fold the edges of the beef up and over the mac and cheese, sealing it completely. Press the seams together firmly to ensure no cheese leaks out. Gently shape the patty back into a round, flat disc. Make sure there are no cracks or thin spots. (Time: 10 minutes)
- Season the Burgers: Generously season both sides of the stuffed burgers with salt and pepper. If you like, you can add a little garlic powder or paprika for extra flavor. (Time: 2 minutes)
- Cook the Burgers: Heat your skillet or grill over medium-high heat. Add a little oil or butter. Place the burgers in the pan and cook for 4-5 minutes on the first side, until a deep brown crust forms. Do not press down on the burgers. Flip them carefully and cook for another 4-5 minutes on the second side. If using the oven method, sear both sides in the skillet for 2 minutes, then transfer to the baking sheet and bake at 375°F (190°C) for 10-12 minutes. (Time: 10-12 minutes)
- Check Temperature: Use an instant-read thermometer to check the internal temperature. It should reach 160°F (71°C). If the center is still cold, cook for an additional 1-2 minutes. (Time: 1 minute)
- Assemble and Serve: Toast your burger buns lightly. Place the cooked patty on the bottom bun. Add your preferred toppings like lettuce, tomato, or bacon. Top with the other bun and serve immediately. (Time: 2 minutes)
Pay close attention to the sealing step. If you see any white meat showing through, press it firmly. A good seal is the difference between a juicy burger and a mess. Trust me, I’ve learned this the hard way.
Cooking Tips & Techniques
After making this recipe many times, I’ve picked up a few tricks that ensure success every time. First, always chill the mac and cheese before stuffing. Cold mac and cheese holds its shape better and prevents the beef from cooking prematurely. Second, handle the beef as little as possible. Overworking the meat makes the burgers tough and dense. Just gently form the patties and stop.
Another common mistake is cooking the burgers on too high heat. High heat can burn the outside before the inside is cooked, especially with a thick, stuffed patty. Medium-high heat is the sweet spot. It allows the crust to form while the heat penetrates to the center. If you notice the burgers are browning too fast, lower the heat and cover the pan with a lid to steam the inside.
Also, consider using a double-boiler method for the cheese sauce if you are making it from scratch. This prevents the cheese from seizing or becoming grainy. Stir constantly and keep the heat low. For the best results, use a cast-iron skillet. It retains heat well and gives you that perfect, restaurant-quality sear. And don’t skip the resting period. Let the burgers rest for 2-3 minutes after cooking. This allows the juices to redistribute, ensuring a juicy bite.
Variations & Adaptations
One of the best things about this recipe is how customizable it is. You can tweak it to suit your dietary needs or flavor preferences. Here are a few ideas:
- Spicy Kick: Add diced jalapeños or a dash of cayenne pepper to the mac and cheese mixture. This adds a nice heat that cuts through the richness of the cheese.
- Chicken Version: Substitute the ground beef with ground chicken or turkey. You may need to add a little extra moisture, like a tablespoon of olive oil or mayonnaise, to prevent dryness.
- Veggie Option: Use a plant-based ground beef alternative and vegan cheese. Many brands now make vegan cheddar that melts well. The technique remains the same.
- different Pasta: Try using small shells or cavatappi pasta instead of elbows. These shapes hold sauce well and add a nice visual appeal.
- Gluten-Free: Use gluten-free elbow macaroni and a gluten-free burger bun. Most major brands make good GF pasta that doesn’t get mushy.
I personally love adding a little bit of crispy bacon bits to the mac and cheese. It adds a smoky, salty crunch that pairs perfectly with the beef. You can also swap the cheddar for gouda or pepper jack for different flavor profiles. The possibilities are endless, so don’t be afraid to experiment.
Serving & Storage Suggestions
When serving, presentation matters. These burgers are messy, so serve them on sturdy plates with napkins on hand. I recommend serving them with crispy fries, coleslaw, or a simple green salad to balance the heaviness. A cold beer or a lemonade pairs well with the rich flavors.
For storage, let the burgers cool completely before refrigerating. Store them in an airtight container in the fridge for up to 3 days. To reheat, I recommend using an oven or air fryer at 350°F (175°C) for about 10 minutes. This helps retain the texture. Avoid microwaving, as it can make the pasta soggy and the beef rubbery. You can also freeze the uncooked, stuffed burgers. Wrap them individually in plastic wrap and place them in a freezer bag. They will keep for up to 2 months. Thaw in the fridge overnight before cooking.
The flavors actually develop over time. If you make the mac and cheese the night before, it tastes even better the next day as the flavors meld together. Just make sure to chill it thoroughly before assembling.
Nutritional Information & Benefits
While this is definitely an indulgent meal, it does have some nutritional benefits. Ground beef is a great source of protein and iron, which are essential for energy and muscle health. The cheese provides calcium and vitamin D, which support bone health. However, this dish is also high in calories, saturated fat, and sodium, so enjoy it in moderation.
If you are watching your carb intake, you can reduce the amount of pasta or use a lower-carb pasta alternative. For a lighter option, use lean ground turkey and reduced-fat cheese. Keep in mind that the nutritional values will vary depending on the specific brands and ingredients you use. As a general guideline, each burger contains approximately 600-700 calories, with 30-40g of protein. It’s a meal that satisfies, but it’s not one to have every day. Balance it with plenty of vegetables and activity.
Conclusion
The cheesy mac and cheese stuffed burger is more than just a recipe; it’s an experience. It combines the nostalgia of comfort food with the excitement of a gourmet burger. I hope you try this recipe and find as much joy in making it as I did in perfecting it. It’s a great way to bring people together around the grill and create lasting memories. Don’t be afraid to make it your own. Add your favorite toppings, try different cheeses, or experiment with spices. The beauty of cooking is in the customization.
I’d love to hear how yours turns out. Share your photos and any variations you try in the comments below. If you make this, tag me on social media so I can see your creations. And if you have any questions, feel free to ask. Happy grilling, and enjoy every cheesy, juicy bite!
FAQs
Can I freeze the stuffed burgers before cooking?
Yes, you can. Assemble the burgers as directed, then wrap each one tightly in plastic wrap and place them in a freezer-safe bag. They can be frozen for up to 2 months. Thaw them in the refrigerator overnight before cooking. You may need to add a few extra minutes to the cooking time if you cook them from frozen.
How do I prevent the cheese from leaking out?
The key is to seal the edges firmly. After placing the mac and cheese ball in the center of the beef, fold the edges up and pinch them together tightly. Make sure there are no cracks or thin spots. Chilling the mac and cheese before stuffing also helps it hold its shape and reduces the risk of leaking.
Can I use ground turkey instead of beef?
Yes, you can use ground turkey. However, turkey is leaner than beef, so you may want to add a tablespoon of olive oil or mayonnaise to the meat to keep it juicy. Also, make sure to cook the turkey to an internal temperature of 165°F (74°C) for safety.
What type of cheese is best for this recipe?
A combination of sharp cheddar and mozzarella works best. The cheddar provides flavor, while the mozzarella provides stretch. You can also try adding some gouda or pepper jack for different flavor profiles. Avoid pre-shredded cheese, as it doesn’t melt as smoothly.
How do I store leftover stuffed burgers?
Store leftovers in an airtight container in the refrigerator for up to 3 days. Reheat them in an oven or air fryer at 350°F (175°C) for about 10 minutes to maintain texture. Avoid microwaving, as it can make the pasta soggy.
Pin This Recipe!
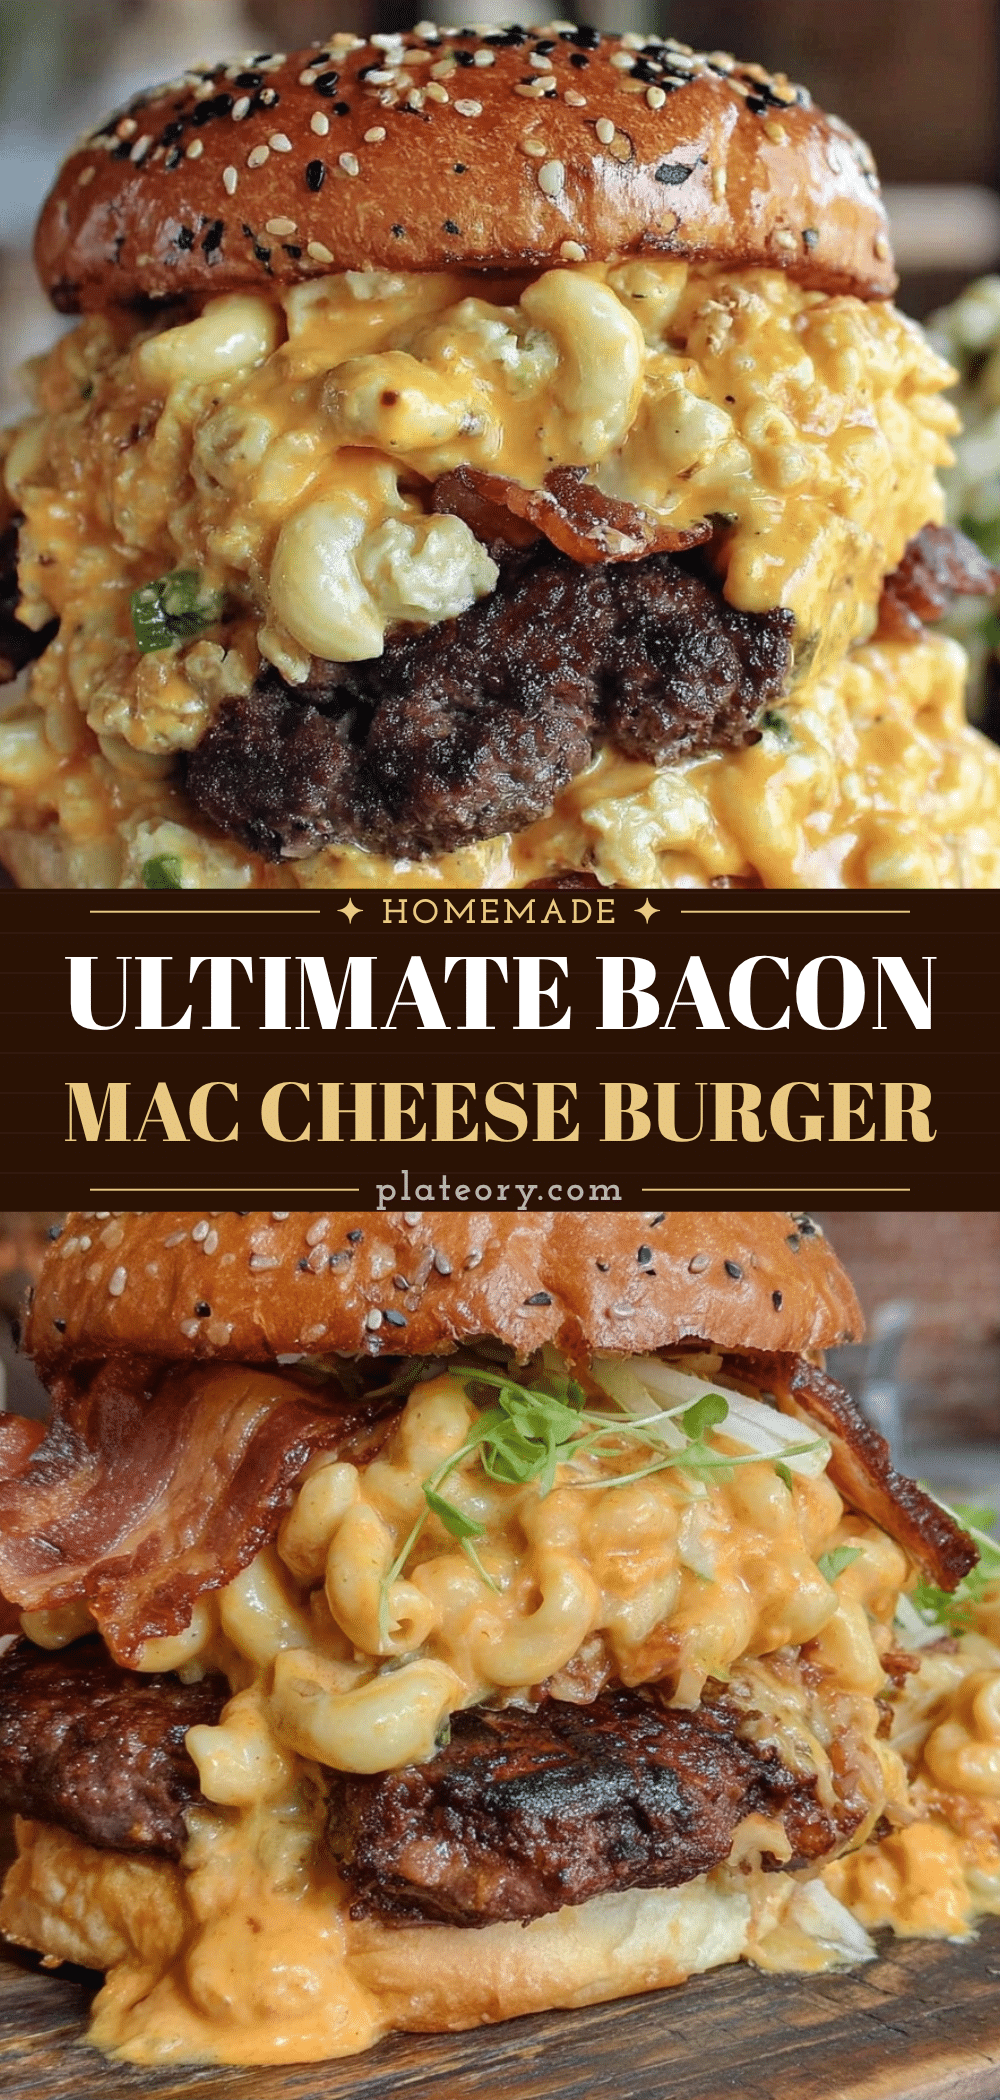

Cheesy Mac And Cheese Stuffed Burger
- Total Time: 45 minutes
- Yield: 4 servings 1x
Description
A juicy, indulgent burger featuring a molten center of creamy mac and cheese, sealed inside a savory beef patty. This crowd-pleasing recipe combines two American classics for a memorable comfort food experience.
Ingredients
- 1 pound (450g) ground beef (80/20 blend)
- 1 cup (200g) dry elbow macaroni
- 1 cup (100g) sharp cheddar cheese, shredded
- ½ cup (50g) low-moisture mozzarella cheese, shredded
- 2 tablespoons unsalted butter
- ¼ cup (60ml) whole milk
- 1 teaspoon garlic powder
- 1 teaspoon onion powder
- Salt and pepper to taste
- 4 sturdy burger buns (brioche or potato rolls)
- Optional toppings: lettuce, tomato, pickles, bacon
Instructions
- Bring a large pot of salted water to a boil. Add elbow macaroni and cook al dente (1-2 minutes less than package directions). Drain and rinse under cold water to stop cooking. Set aside to cool.
- In a small saucepan over low heat, melt butter. Add garlic powder and onion powder, stirring for 30 seconds until fragrant. Pour in milk and stir. Remove from heat and stir in cheddar and mozzarella until melted and smooth. Season with a pinch of salt and pepper.
- Add cooked macaroni to the cheese sauce and stir to coat. Spread mixture onto a baking sheet or plate to cool completely. Chill in the fridge for 15 minutes if necessary.
- Divide ground beef into four equal portions (approx. 4 oz each). Gently form each portion into a flat, wide disc larger than the burger bun.
- Roll about ¼ cup of the cooled mac and cheese mixture into a ball per portion.
- Place a mac and cheese ball in the center of each beef disc. Fold the edges of the beef up and over the filling, sealing tightly. Press seams firmly to prevent leaking. Reshape into a round, flat disc.
- Season both sides of the stuffed burgers generously with salt and pepper.
- Heat a skillet or grill over medium-high heat with oil or butter. Cook burgers for 4-5 minutes on the first side until a deep brown crust forms. Flip and cook for another 4-5 minutes. Alternatively, sear both sides for 2 minutes, then bake at 375°F (190°C) for 10-12 minutes.
- Check internal temperature with an instant-read thermometer; it should reach 160°F (71°C).
- Toast burger buns lightly. Assemble burgers with toppings and serve immediately.
Notes
Ensure the mac and cheese is completely cool before stuffing to prevent the beef from cooking prematurely. Handle the beef gently to avoid tough burgers. Seal the edges firmly to prevent leakage. For best results, use a cast-iron skillet for a good sear. Let burgers rest for 2-3 minutes after cooking.
- Prep Time: 30 minutes
- Cook Time: 12 minutes
- Category: Main Course
- Cuisine: American
Nutrition
- Serving Size: 1 stuffed burger wit
- Calories: 650
- Sugar: 4
- Sodium: 800
- Fat: 40
- Saturated Fat: 18
- Carbohydrates: 35
- Fiber: 2
- Protein: 35
Keywords: stuffed burger, mac and cheese burger, comfort food, summer cookout, easy dinner, beef recipes, cheesy burger