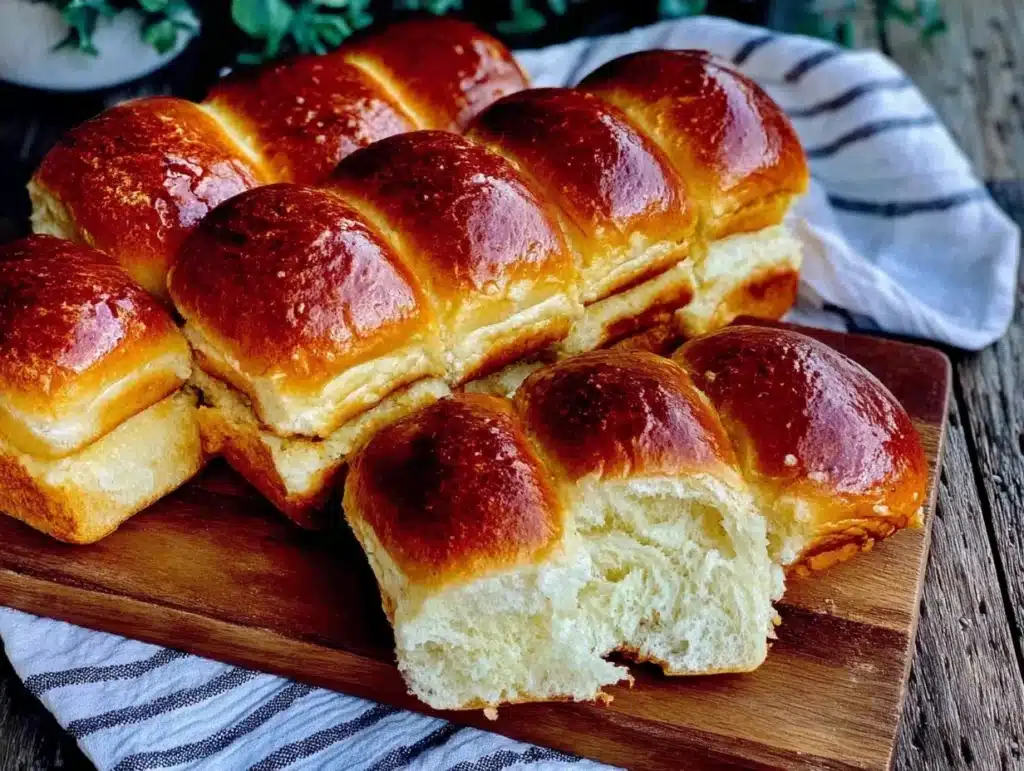
Let’s be honest for a second. There is nothing worse than biting into a hot dog bun that crumbles into a dozen pieces before you can even get the first bite into your mouth. It’s a texture nightmare, and honestly, it ruins the entire experience of a perfectly grilled frankfurter. I remember the first time I tried to make my own buns, I was trying to save money for a summer barbecue. I ended up with bricks. Hard, dense, sad little bricks that could double as doorstops.
Fast forward to today, and I’ve perfected a recipe that delivers soft, pillowy, slightly sweet buns that hold their shape but melt in your mouth. This isn’t just about convenience; it’s about that specific balance of flavors that makes a simple street food feel like a gourmet meal. You know that feeling when you’re at a fair in Vienna or a park in Berlin, and the bread is just… right? That’s the balance that makes it taste like where it’s from. We’re aiming for that airy, tender crumb without the fuss of complex techniques.
I’ve tested this recipe over a dozen times, tweaking the hydration and the proofing times, to get it just right for your home kitchen. Whether you’re hosting a backyard cookout or just craving a really good hot dog on a Tuesday night, these homemade hot dog buns will change the game. They are easier than you think, and the smell of baking bread will have your neighbors wondering what you’re up to. Let’s face it, store-bought buns just can’t compete with the freshness of bread you pulled out of your own oven an hour ago.
Why You’ll Love This Recipe
After years of baking bread, both the successes and the failures, I can confidently say that this recipe stands out for a few key reasons. It’s not just another yeast bread recipe; it’s a specifically engineered solution for the hot dog bun. Most bread recipes aim for a chewy crust or a dense interior, but here we are chasing softness. We are chasing that cloud-like texture that gives way to the snap of a good frankfurter. This recipe isn’t just good—it is the kind that makes you close your eyes after the first bite. It’s comfort food reimagined—healthier, faster, but with the same soul-soothing satisfaction.
Here is why this recipe deserves a spot in your regular rotation:
- Quick & Easy: You don’t need a stand mixer or hours of kneading. This dough comes together quickly, and the bulk fermentation does most of the work for you. Perfect for busy weeknights or last-minute cravings when you realize you’re out of buns.
- Simple Ingredients: No fancy grocery trips needed. You likely already have everything in your kitchen. Flour, yeast, sugar, salt, milk, butter, and an egg. That’s it. No obscure flours or exotic spices to track down.
- Perfect for Summer Cookouts: Whether it’s a Fourth of July celebration, a casual backyard BBQ, or a cozy family dinner, these buns are versatile. They pair beautifully with grilled meats, sausages, and even pulled pork.
- Crowd-Pleaser: Always gets rave reviews from kids and adults alike. Kids love the soft texture, and adults appreciate the homemade quality. It’s a win-win for family meals.
- Unbelievably Delicious: The texture and flavor combo is next-level comfort food. The slight sweetness from the sugar and milk balances the savory salt of the dough, creating a perfect vessel for your toppings.
What makes this recipe different from the rest is the technique. We use a milk bath method for the shaped buns before baking. This creates that glossy, soft crust that is characteristic of high-quality bakery buns. It’s a small step that makes a huge difference. Plus, the dough is highly hydrated, which contributes to the open, airy crumb structure. This isn’t just another version—it’s your best version. It’s perfect for impressing guests without stress, or turning a simple meal into something memorable.
What Ingredients You Will Need
This recipe uses simple, wholesome ingredients to deliver bold flavor and satisfying texture without the fuss. The beauty of bread making lies in the quality of your basics. Since there are so few components, each one plays a critical role in the final texture and taste. I always recommend using bread flour for its higher protein content, which helps create that strong gluten network needed for a soft, stretchy bun. However, all-purpose flour works in a pinch if that’s all you have.
- Bread Flour (500g / 4 cups): The backbone of the recipe. Its high protein content ensures the buns have structure while remaining soft. I prefer King Arthur Bread Flour for its consistency.
- Instant Yeast (7g / 1 packet): Quick-rising yeast saves time. You can use active dry yeast, but you’ll need to dissolve it in warm liquid first. Instant yeast can be mixed directly into the dry ingredients.
- Granulated Sugar (50g / ¼ cup): Adds a touch of sweetness that balances the savory elements. It also feeds the yeast, helping with the rise. Don’t skip this; it contributes to the golden crust color.
- Salt (10g / 2 tsp): Essential for flavor development. Salt also strengthens the gluten structure. Use fine sea salt or table salt for even distribution.
- Whole Milk (240ml / 1 cup): Using warm milk instead of water adds richness and tenderness to the crumb. Milk solids help keep the bread soft for longer periods. Make sure it’s warm, not hot, to avoid killing the yeast.
- Unsalted Butter (50g / ¼ cup): Softened butter adds flavor and further tenderizes the dough. It coats the gluten strands, resulting in a softer final product. Room temperature is key here.
- Large Egg (1): Used in the dough and for the egg wash. The egg adds richness, color, and structure. Use a large egg at room temperature for best results.
- Water (for the milk bath): We use a shallow pan of water in the oven to create steam. This helps the buns expand fully before the crust sets, ensuring maximum softness.
For the milk bath, you’ll need a shallow roasting pan. I recommend using a heavy-bottomed pan that can withstand high heat. If you don’t have one, a standard baking sheet works, but the steam generation might be slightly less effective. Look for firm, small-curd cottage cheese if you were making a different recipe, but for these buns, stick to the basics. In summer, you might find that the dough rises faster due to ambient heat, so keep an eye on the proofing time.
Equipment Needed
You don’t need a fancy kitchen to make these buns. A few basic tools will get you professional results. A digital kitchen scale is the most important tool for accuracy. Baking is a science, and volume measurements can vary wildly. Weighing your flour ensures the dough has the correct hydration. If you don’t have a scale, use the spoon-and-level method, but know that the results may vary slightly.
A large mixing bowl is essential for combining the ingredients. If you’re using a stand mixer, a dough hook attachment is great for kneading. However, this dough is soft and sticky, so hand kneading is also very doable. It just takes a bit more arm strength. A baking sheet lined with parchment paper is necessary for baking. Parchment paper prevents sticking and makes cleanup a breeze. I’ve tried silicone mats, but parchment gives me better browning control.
You’ll also need a shallow roasting pan for the steam bath. This creates the humid environment in the oven, which is crucial for soft crusts. If you don’t have one, a cast-iron skillet works well. Budget-friendly options include using a cast-iron skillet or a cheap metal roasting pan from a thrift store. Avoid glass dishes for the steam bath as they can shatter under rapid temperature changes. A pastry brush is needed for the egg wash to give those buns a beautiful golden shine.
How to Make Soft Hot Dog Buns
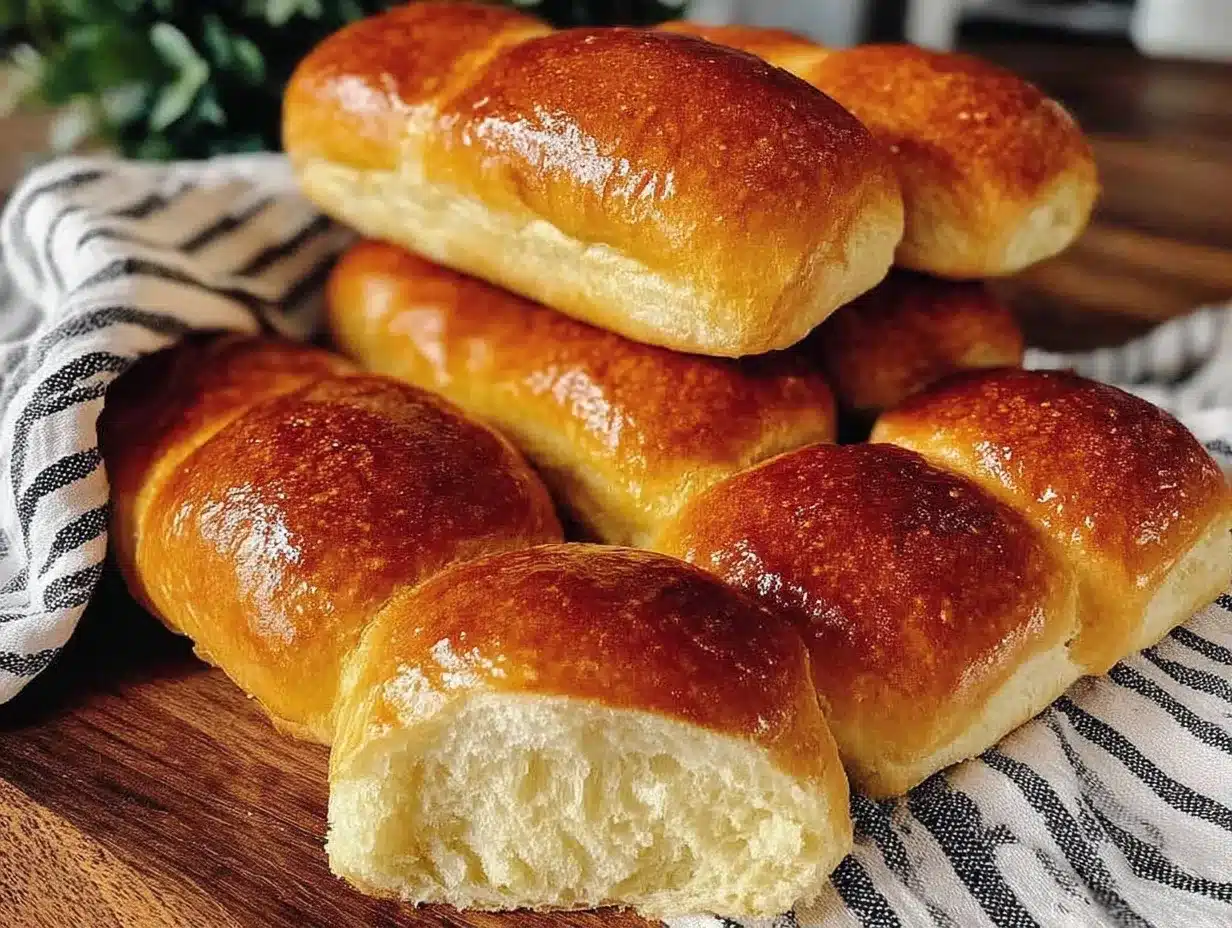
Start by preparing your wet ingredients. In a small saucepan or microwave-safe bowl, warm the milk until it reaches about 110°F (43°C). It should feel warm to the touch, like baby formula. Do not let it boil, or you will kill the yeast. Stir in the sugar and the softened butter until they are completely dissolved. Let this mixture cool slightly until it is just warm to the touch, around 100°F (38°C). This step ensures the yeast activates properly without being shocked by heat.
In the bowl of a stand mixer fitted with a dough hook, combine the bread flour and salt. Mix on low speed for 30 seconds to distribute the salt evenly. Pour in the warm milk mixture and the egg. Mix on low speed until a shaggy dough forms, about 2 minutes. Then, increase the speed to medium-low and knead for 5-7 minutes. The dough should be soft, slightly sticky, and smooth. If it’s too dry, add water one tablespoon at a time. If it’s too wet, add flour one tablespoon at a time. The dough should pass the windowpane test, meaning you can stretch a small piece thin enough to see light through it without it tearing.
Transfer the dough to a lightly oiled bowl. Cover it with plastic wrap or a damp kitchen towel. Let it rise in a warm, draft-free area for 1 to 1.5 hours, or until it has doubled in size. This is the bulk fermentation stage, where the flavor develops. While the dough is rising, prepare your baking sheet. Line it with parchment paper. Once the dough has risen, gently punch it down to release excess gas. Turn it out onto a lightly floured surface.
Divide the dough into 8 equal pieces. I recommend using a scale to ensure each bun is the same weight, which promotes even baking. Shape each piece into an oval. Roll the dough between your palms to create a smooth surface on top. Place the shaped buns on the prepared baking sheet, spacing them about 2 inches apart. They will expand significantly during the second rise. Cover them loosely and let them rise again for 30-45 minutes, until they are puffy and nearly doubled.
Preheat your oven to 375°F (190°C). Place a shallow roasting pan with 1 cup of water on the bottom rack of the oven. This creates steam. Brush the tops of the buns with the beaten egg. This will give them a beautiful, glossy finish. Carefully place the baking sheet on the middle rack of the oven. Bake for 15-18 minutes, or until the buns are golden brown and sound hollow when tapped on the bottom. The internal temperature should reach 190°F (88°C). Remove from the oven and transfer to a wire rack to cool. Brush with melted butter if you want extra softness.
Cooking Tips & Techniques
One of the most common mistakes people make with bread is over-kneading or under-kneading. With this soft dough, it’s easy to add too much flour while kneading. Resist the urge. The dough should feel tacky but not stick to your hands. If you add too much flour, the buns will be dense. Instead, wet your hands with water or oil to handle the dough. This technique saves the texture of the final product.
Temperature control is critical. Yeast is alive, and it reacts to its environment. If your kitchen is cold, your dough will rise slowly. If it’s too hot, the yeast might over-proof and collapse. A good trick is to turn on your oven to 200°F for a minute, then turn it off. Place your covered dough bowl inside. This creates a perfect proofing box. I’ve learned this the hard way after leaving my dough in a drafty corner for hours, wondering why it wasn’t rising.
Steam is the secret to soft crusts. The steam bath prevents the crust from forming too early, allowing the buns to expand fully. Without steam, the crust sets quickly, resulting in a smaller, denser bun. Make sure your water pan is placed correctly in the oven. Be careful when opening the oven door, as the steam will escape quickly. This step is non-negotiable for achieving that bakery-style softness.
Another tip is to let the buns cool completely before slicing. It’s tempting to cut into them while they’re warm, but the structure is still setting. Slicing warm bread can lead to a gummy interior. Use a serrated bread knife for clean cuts. This patience pays off with a better texture and presentation. Also, avoid overcrowding the baking sheet during the second rise. The buns need room to expand, or they will stick together and bake unevenly.
Variations & Adaptations
While the classic recipe is delicious, there are many ways to customize these buns to suit your tastes. For a whole wheat option, substitute half of the bread flour with whole wheat flour. This adds a nutty flavor and more fiber, though the texture will be slightly denser. For a richer flavor, use whole milk instead of part-skim, or add a tablespoon of honey to the dough. The honey adds a subtle sweetness that pairs well with spicy sausages.
If you want to add a crunch, sprinkle sesame seeds, poppy seeds, or coarse sea salt on top of the buns after brushing with egg wash. These seeds adhere well to the wet surface and add a nice textural contrast. For a garlic lover’s version, mix minced garlic and dried herbs into the softened butter before brushing the tops. This creates a savory twist that is perfect for burgers or pulled pork.
For dietary adaptations, you can use dairy-free milk and butter substitutes. The texture may vary slightly, but the flavor will still be good. For a gluten-free option, use a high-quality gluten-free flour blend that includes xanthan gum. Note that gluten-free doughs behave differently and may require less water. I’ve tried almond flour substitutes, but they don’t provide the same structure. Stick to blends designed for yeast breads. You can also freeze the shaped, unbaked buns. Place them on a tray in the freezer, then transfer to a bag. Bake from frozen, adding a few minutes to the baking time.
Serving & Storage Suggestions
These buns are best served warm, straight from the oven. They are perfect for classic hot dogs with mustard, ketchup, and relish. But don’t stop there. Try them with chili dogs, grilled bratwursts with sauerkraut, or even pulled pork sandwiches. The soft texture holds up well to juicy toppings without getting soggy immediately. Serve them with a side of coleslaw or potato salad for a complete summer meal. A cold beer or lemonade complements the savory flavors beautifully.
For storage, allow the buns to cool completely before placing them in an airtight container or plastic bag. They can be kept at room temperature for up to 3 days. For longer storage, freeze them. Wrap them tightly in plastic wrap and then in aluminum foil. They will last for up to 3 months in the freezer. To reheat, thaw them at room temperature and warm them in a 350°F oven for 5-10 minutes. This restores their softness. Avoid microwaving, as it can make them chewy.
The flavors of these buns develop over time as the starches retrograde. Day-old buns are actually better for toasting, as they hold their shape better. If you make a batch for a party, consider making them the day before. They will stay soft and fresh. You can also split them horizontally for sandwiches. The interior crumb is tender enough for delicate fillings but sturdy enough for hearty ones. Experiment with different toppings to find your favorite combination.
Nutritional Information & Benefits
While these buns are a treat, they are made with simple, recognizable ingredients. Each bun contains approximately 180-200 calories, depending on size and exact flour type. They provide a good source of carbohydrates for energy, which is ideal for active lifestyles. The use of whole milk adds calcium and protein, contributing to bone health. However, they do contain gluten, so they are not suitable for those with celiac disease or gluten sensitivity.
Homemade bread allows you to control the amount of sugar and salt. Store-bought buns often contain preservatives and additives that you can avoid by making your own. This means fewer processed ingredients and a cleaner label. The butter adds healthy fats, though it should be consumed in moderation. For a lower-calorie option, you can reduce the sugar slightly without affecting the rise too much. Always consider portion sizes, as bread is easy to overeat. Pairing them with lean proteins and vegetables creates a balanced meal.
From a wellness perspective, homemade bread can be more satisfying, leading to better portion control. The aroma and freshness can enhance the dining experience, making you more mindful of your food. I enjoy these buns as part of a balanced diet, using them as a vehicle for nutrient-dense toppings. They are a reminder that comfort food can be made with care and quality ingredients. Enjoy them as part of a varied diet that includes plenty of fruits and vegetables.
Frequently Asked Questions
Can I use active dry yeast instead of instant yeast?
Yes, you can use active dry yeast. You will need to dissolve it in the warm milk mixture and let it sit for 5-10 minutes until it becomes foamy before adding it to the flour. This activates the yeast. The rising time may be slightly longer, so be patient.
Why are my buns dense and not soft?
Dense buns are often caused by over-kneading, under-proofing, or adding too much flour. Make sure your dough is soft and tacky, not stiff. Allow enough time for the dough to rise until it doubles in size. Also, check your yeast expiration date, as old yeast won’t rise properly.
Can I freeze the baked buns?
Absolutely. Let the buns cool completely, then wrap them tightly in plastic wrap and place them in a freezer-safe bag. They will keep for up to 3 months. Thaw at room temperature and warm in the oven before serving.
How do I store leftover buns?
Store them in an airtight container or plastic bag at room temperature for up to 3 days. Do not refrigerate, as this can make them stale faster. For longer storage, freeze them.
Can I make these buns ahead of time?
You can shape the buns and refrigerate them overnight for a slow rise. This develops more flavor. Let them come to room temperature and finish rising before baking. This is a great time-saving technique for busy days.
Conclusion
Making your own hot dog buns is easier than you think and the results are worth the effort. These soft, pillowy buns will elevate your next cookout or family dinner. They are simple to make, require minimal equipment, and taste incredible. I hope this recipe brings you as much joy as it has brought me. Feel free to customize them with your favorite seeds or spices. I’d love to hear how you enjoy them. Leave a comment below with your favorite hot dog toppings or share a photo of your creation. Happy baking!
Pin This Recipe!


Easy Homemade Hot Dog Buns: Perfect Soft Bread Recipe
- Total Time: 48 minutes
- Yield: 8 servings 1x
Description
Soft, pillowy, and slightly sweet homemade hot dog buns that are easier than you think. This recipe uses a milk bath method and steam to create a bakery-quality, airy crumb with a glossy crust.
Ingredients
- 500g (4 cups) Bread Flour
- 7g (1 packet) Instant Yeast
- 50g (1/4 cup) Granulated Sugar
- 10g (2 tsp) Salt
- 240ml (1 cup) Whole Milk, warmed
- 50g (1/4 cup) Unsalted Butter, softened
- 1 Large Egg, room temperature
- 1 cup Water (for steam bath)
- 1 Egg (beaten, for egg wash)
- Melted butter (optional, for brushing after baking)
Instructions
- Warm the milk to 110°F (43°C). Stir in sugar and softened butter until dissolved. Let cool to 100°F (38°C).
- In a stand mixer bowl with a dough hook, combine bread flour and salt. Mix on low for 30 seconds.
- Pour in the warm milk mixture and egg. Mix on low until a shaggy dough forms (2 minutes).
- Knead on medium-low speed for 5-7 minutes until the dough is soft, slightly sticky, and smooth. It should pass the windowpane test.
- Transfer dough to a lightly oiled bowl. Cover and let rise in a warm, draft-free area for 1 to 1.5 hours, or until doubled in size.
- Punch down the dough and turn it out onto a lightly floured surface.
- Divide dough into 8 equal pieces. Shape each into an oval and place on a parchment-lined baking sheet, spacing 2 inches apart.
- Cover loosely and let rise again for 30-45 minutes until puffy and nearly doubled.
- Preheat oven to 375°F (190°C). Place a shallow roasting pan with 1 cup of water on the bottom rack to create steam.
- Brush the tops of the buns with beaten egg.
- Bake on the middle rack for 15-18 minutes until golden brown and internal temperature reaches 190°F (88°C).
- Remove from oven and transfer to a wire rack. Brush with melted butter if desired for extra softness.
Notes
Use a milk bath method (steam in the oven) to ensure soft crusts. Do not let the milk get too hot (above 110°F) or you will kill the yeast. If your kitchen is cold, proof the dough in a turned-off oven with the light on. Let buns cool completely before slicing to prevent a gummy interior.
- Prep Time: 30 minutes
- Cook Time: 18 minutes
- Category: Side Dish
- Cuisine: American
Nutrition
- Serving Size: 1 bun
- Calories: 190
- Sugar: 6
- Sodium: 250
- Fat: 5
- Saturated Fat: 3
- Carbohydrates: 30
- Fiber: 1
- Protein: 5
Keywords: hot dog buns, homemade bread, soft bread recipe, yeast bread, summer cookout, bakery style buns, easy bread recipe