Let’s be honest for a second. I used to think “protein ice cream” was just a marketing lie told by fitness influencers who never actually tasted it. You know the kind—chalky, icy, and vaguely like eating a supplement shaker. I was wrong. So, so wrong.
I first tried making a Ninja Creami Protein Shake as a lazy Sunday morning experiment. I had leftover vanilla whey isolate and a half-empty pint container from my Ninja Creami. I didn’t expect much. I just wanted something cold to eat while I scrolled through my phone.
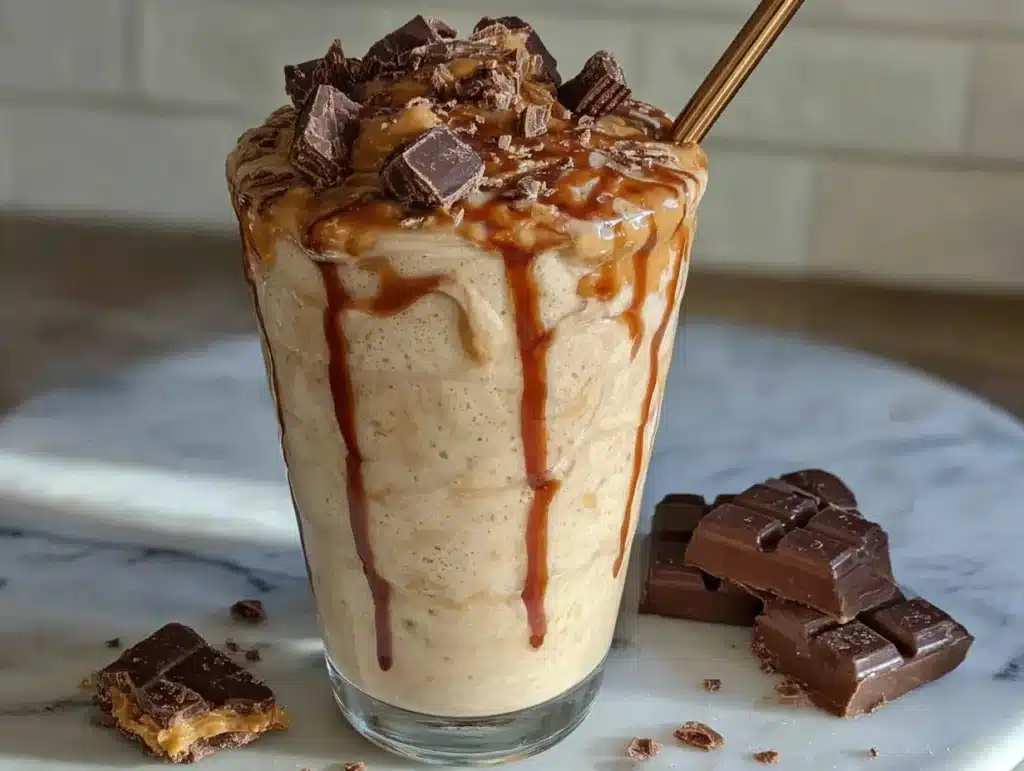
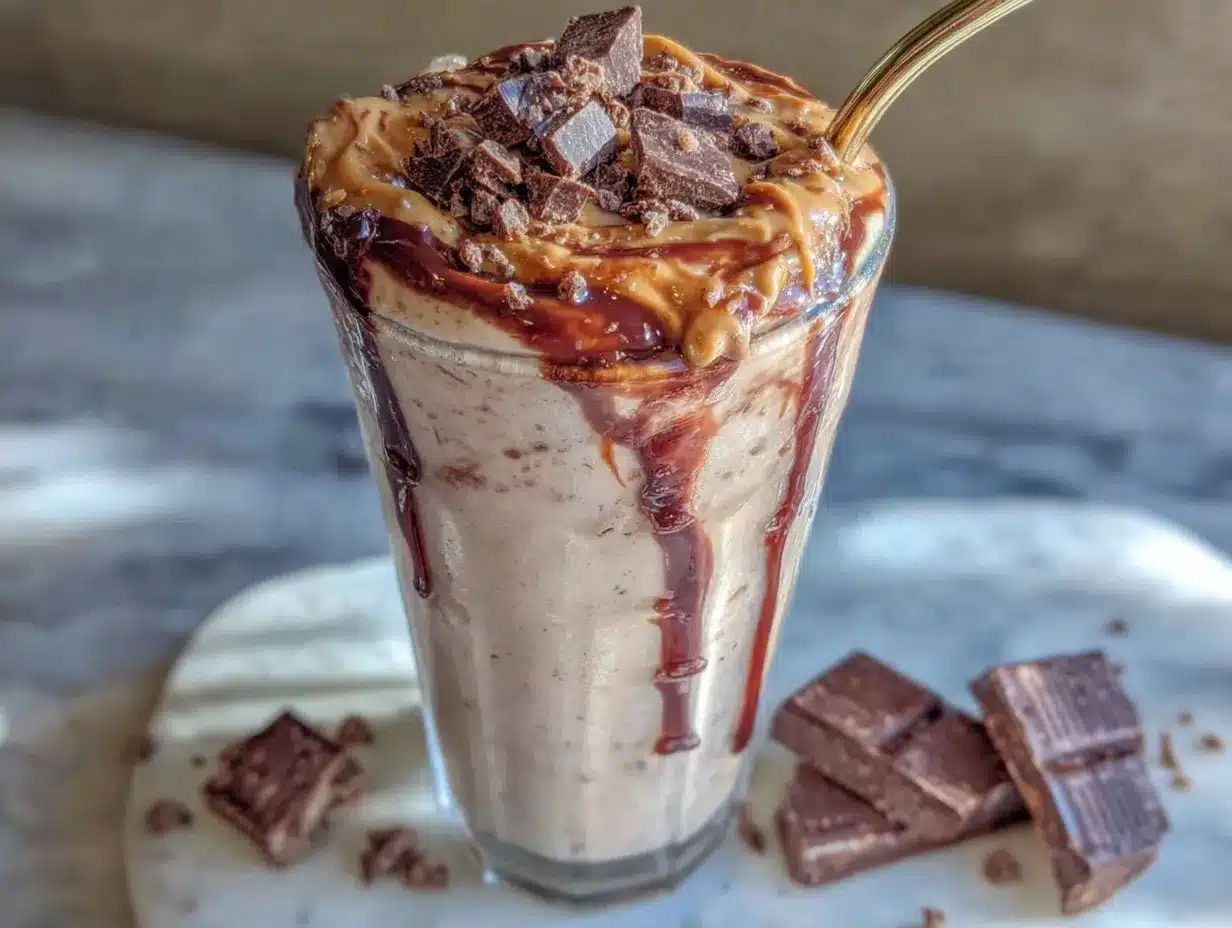
But then I cranked the handle. The machine did its thing, and what came out wasn’t ice. It was creamy, dense, and shockingly delicious. It tasted like a high-end gelato, but with twenty grams of protein. I couldn’t believe my own taste buds.
That moment was a game-changer for my post-workout routine. Honestly, it’s become my go-to treat when I need something sweet but don’t want to derail my nutrition goals. It’s not just a snack; it’s a lifestyle hack that actually tastes good.
If you’ve been skeptical about frozen protein treats, I get it. But once you try this Ninja Creami Protein Shake, you’ll never go back to sugary, empty-calorie ice cream. It’s the perfect balance of indulgence and nutrition, and it’s easier than you think.
I’ve tested this recipe dozens of times with different flavors and protein powders. I’ve learned what works and what turns into a snowy mess. This version is the gold standard. It’s smooth, it’s satisfying, and it pairs beautifully with a piece of buttered toast for that perfect balance of sweet and savory.
Whether you are a gym rat, a busy parent, or just someone who loves dessert, this recipe is for you. It’s quick, it’s healthy, and it’s honestly the best thing I’ve made in my kitchen this year.
Why You’ll Love This Recipe
There is a specific kind of magic that happens when you combine high-quality protein with the right freezing technique. After years of experimenting with frozen desserts, I can tell you that most recipes fail because they ignore texture. This Ninja Creami Protein Shake gets the texture exactly right.
Here is why this recipe has earned a permanent spot in my weekly meal prep:
- Quick & Easy: From freezer to machine to bowl, it takes less than ten minutes of active time. The bulk of the time is just waiting for it to freeze, which means you can prep it the night before and forget about it.
- Simple Ingredients: You don’t need a degree in food science. You just need protein powder, a liquid base, and a little bit of fat for creaminess. No fancy gums or stabilizers that you can’t pronounce.
- Perfect for Post-Workout: This is the ideal recovery snack. It replenishes glycogen and repairs muscle tissue without feeling like you just ate a heavy meal. It’s light on the stomach but heavy on satisfaction.
- Crowd-Pleaser: Even my kids, who usually hate “healthy” food, ask for this. They think it’s regular ice cream. When I tell them it’s protein, they look at me like I’m crazy. That’s the win.
- Unbelievably Delicious: The texture is dense and creamy, similar to soft-serve but richer. It melts in your mouth in the best way possible.
What makes this different from other protein ice creams? It’s the addition of a small amount of fat and the specific way the Ninja Creami processes the frozen block. Most people just freeze milk and protein, and it turns into a brick. This recipe uses a balanced ratio that ensures smoothness.
I also love that it connects to a broader tradition of eating well. In many cultures, dairy is central to meals. This recipe honors that by using real dairy (or dairy alternatives) as the star, not just a filler.
It’s comfort food reimagined. It’s the kind of treat that makes you feel good about yourself while you eat it. You close your eyes, take a bite, and just enjoy the moment. No guilt, just flavor.
What Ingredients You Will Need
This recipe relies on a few key components to achieve that perfect, scoopable texture. The secret isn’t in having expensive ingredients, but in having the right balance of liquid, protein, and fat. If you get the ratios wrong, you’ll end up with ice crystals. If you get them right, you get creaminess.
Here is what you need to gather before you start:
- Vanilla Whey Protein Isolate (25-30g): This is your primary flavor and protein source. I recommend using a high-quality isolate because it mixes better and has less lactose. Brands like Optimum Nutrition or Dymatize work well, but any unflavored or vanilla isolate will do. Avoid cheap concentrates if you can, as they can be clumpy.
- Heavy Cream or Half-and-Half (2 tbsp): This is the secret weapon. Fat carries flavor and creates a smooth texture. Without it, your protein ice cream will be icy. You can use full-fat coconut milk if you are dairy-free, but the creaminess will be slightly different.
- Unsweetened Almond Milk or Whole Milk (1/4 cup): This provides the liquid base. You need enough liquid to allow the machine to spin, but not so much that it becomes soup. Almond milk keeps it lighter, while whole milk makes it richer.
- Greek Yogurt (2 tbsp): This adds tang and thickness. It helps stabilize the mixture and gives it that yogurt-like consistency that feels more substantial than regular ice cream. Use plain, non-fat or low-fat Greek yogurt for the best results.
- Stevia or Erythritol (1-2 packets or 1 tsp): Most whey proteins are already sweetened, so taste your protein powder first. If it’s unsweetened, you’ll need a sweetener. I prefer liquid stevia drops because they don’t add bulk. If using granular sweeteners, make sure they dissolve completely.
- Ice Cubes (4-6 small cubes): This is optional but helpful. Adding a few ice cubes before spinning helps create a lighter, airier texture. It mimics the churning process of traditional ice cream makers.
- Pinch of Salt: Never skip the salt. It enhances the vanilla flavor and balances the sweetness. It’s a small detail that makes a big difference.
For the best results, make sure your protein powder is fresh. Old powder can clump and affect the texture. Also, ensure all ingredients are at room temperature before mixing, except for the final freeze. This helps everything blend evenly.
If you are allergic to dairy, you can swap the whey for a pea or soy protein isolate. However, plant-based proteins often require a bit more liquid to achieve the same smoothness. Test a small batch first.
Equipment Needed
You don’t need a fancy kitchen to make this, but you do need one specific tool: the Ninja Creami. It is a game-changer for frozen desserts. The high-speed blade shaves the frozen block into a smooth, creamy consistency that traditional blenders can’t achieve.
- Ninja Creami Machine: This is non-negotiable for this recipe. The “Lite Ice Cream” or “Ice Cream” setting works best. Do not try to make this in a standard blender; it will not get the same texture.
- Measuring Spoons and Cups: Precision matters here. Too much liquid and it won’t freeze solid. Too little and the machine will jam. Use standard measuring tools for accuracy.
- Whisk or Small Blender: You need to mix the protein powder with the liquid before freezing. A small whisk works fine, but a personal blender ensures there are no lumps. Lumps are the enemy of smooth ice cream.
- Ninja Creami Pints: Make sure you have the dedicated pint containers. They are designed to fit the machine perfectly and freeze evenly. Regular freezer containers won’t work.
- Spoon or Spatula: For stirring in mix-ins after the first spin. If you want to add chocolate chips or nuts, you’ll need a small spoon to fold them in gently.
I’ve tried using regular freezer trays, and the results are always inferior. The Ninja Creami’s specific blade angle and speed are what create that airy, soft-serve texture. If you don’t have one yet, I highly recommend getting one. It pays for itself in saved money on ice cream shop visits.
Keep your equipment clean and dry. Moisture in the pint container before adding the mixture can cause ice crystals to form during freezing. A quick wipe-down with a paper towel before pouring in your mix is a good habit.
How to Make Your Ninja Creami Protein Shake
Making this Ninja Creami Protein Shake is straightforward, but there are a few critical steps to ensure success. The process is simple, but the details matter. Let’s walk through it together.
- Mix the Base (2 minutes): In a small bowl or blender, combine your whey protein powder, heavy cream, almond milk, Greek yogurt, sweetener, and salt. Whisk vigorously until the mixture is completely smooth. There should be no visible clumps of protein powder. If you see lumps, blend it again. This step takes about two minutes. Pour the mixture into your Ninja Creami pint container. Do not fill past the “Max Fill” line. Leave about half an inch of space at the top.
- Freeze Solid (12-24 hours): Place the lid on the pint and put it in the freezer. It needs to freeze completely solid. This usually takes 24 hours, but if your freezer is very cold, 12 hours might work. The mixture should be hard as a rock. If it’s even slightly soft, the machine will struggle. Plan ahead for this step.
- First Spin (2 minutes): Take the frozen pint out of the freezer. Let it sit on the counter for 10-15 minutes. This is crucial. It takes the edge off the extreme cold, allowing the blade to cut through the ice without jamming. Place the pint in the Ninja Creami. Select the “Lite Ice Cream” setting. Press start. The machine will spin and shave the frozen block. If it looks like snow and doesn’t come out smooth, don’t panic. This is normal.
- Re-Spin with Liquid (1 minute): If the first spin results in a powdery or crumbly texture, remove the pint. Add a splash of milk or cream (about 1-2 tablespoons) to the center. Put it back in the machine and select the “Re-Spin” setting. This adds moisture and brings it together into a creamy consistency. This step usually fixes any texture issues.
- Add Mix-Ins (Optional): If you want to add chocolate chips, nuts, or fruit, use the “Mix-In” setting. First, make sure your mix-ins are chopped into small pieces. Place them in the pint, then select the Mix-In setting. The machine will fold them in gently. Do not try to spin large chunks; they will break the blade.
- Serve Immediately: The ice cream is best eaten immediately after spinning. It has a soft-serve consistency. If you want it harder, put it back in the freezer for 30 minutes. But honestly, it’s best right out of the machine.
Pay attention to the sound of the machine. If it sounds strained, stop and add a bit more liquid. The machine should hum smoothly. If it stops, check for blockages. Clean the blade after each use to maintain performance.
Cooking Tips & Techniques
I’ve made a lot of mistakes with protein ice cream, so you don’t have to. Here are some tips from my trial-and-error process to help you get it right the first time.
Don’t Skip the Rest Time: I know it’s tempting to take it out of the freezer and spin it immediately. But a frozen pint is like a brick. Letting it sit for 10-15 minutes warms it up just enough for the blade to cut cleanly. If you skip this, you might break the blade or get an uneven texture.
Protein Powder Matters: Some protein powders are thicker than others. Whey isolate is thin and mixes easily. Casein is thick and can make the ice cream dense. If you use casein, you may need to add a little more liquid. Experiment to find what works for your brand.
Balancing Sweetness: Taste your protein powder before adding sweetener. Some brands are very sweet, while others are bland. If you add too much sweetener, the ice cream won’t freeze as hard. Adjust accordingly. A little salt goes a long way in enhancing flavor.
Avoid Overfilling: The mixture expands slightly as it freezes. If you fill it to the brim, it might leak or not spin properly. Always leave headspace. It’s better to have a little extra space than to deal with a mess.
Texture Troubleshooting: If your ice cream is too icy, you didn’t have enough fat or protein. If it’s too hard, you didn’t have enough liquid. If it’s too soft, you might have added too much mix-in or liquid. Adjust your ratios next time based on these cues.
Clean the Blade Carefully: Protein powder can stick to the blade. Rinse it immediately after use. Use a soft brush to clean between the blades. Do not use abrasive sponges, as they can dull the blade over time.
Variations & Adaptations
One of the best things about this Ninja Creami Protein Shake is how versatile it is. Once you master the base, you can create endless flavors. Here are a few of my favorites.
Chocolate Peanut Butter: Swap the vanilla protein for chocolate whey. Add a tablespoon of peanut butter to the mix. After the first spin, mix in crushed peanuts. It tastes like a Reese’s cup.
Berry Cheesecake: Use vanilla protein and add a tablespoon of cream cheese to the base. After spinning, mix in freeze-dried strawberries. The tartness of the berries pairs perfectly with the creamy base.
Matcha Green Tea: Use unflavored protein powder and add one teaspoon of culinary-grade matcha powder to the base. It has a subtle, earthy flavor that is refreshing and not too sweet.
Dairy-Free Option: Use pea protein isolate and full-fat coconut milk instead of dairy cream and milk. Add a teaspoon of coconut oil for extra creaminess. The texture will be slightly different but still delicious.
Low-Carb Keto: Ensure your protein powder is keto-friendly (no added sugars). Use heavy cream and erythritol. This version is very low in carbs and high in fat, perfect for a ketogenic diet.
I’ve also tried adding a splash of espresso powder for a mocha flavor. It’s surprisingly good and gives you a caffeine kick. Feel free to experiment with extracts like almond or coconut for different profiles.
Serving & Storage Suggestions
This Ninja Creami Protein Shake is best enjoyed fresh, but it can be stored for later. Here is how to handle it.
Serving Temperature: Serve it immediately after spinning for the softest texture. If you prefer harder ice cream, freeze it for 30-60 minutes. Let it sit on the counter for 5 minutes before scooping if it’s too hard.
Storage: You can store the pint in the freezer for up to two weeks. However, the texture may change slightly over time. It might become icier or harder. To revive it, simply run it through the “Re-Spin” setting for a minute.
Pairing Idea: I love serving this with a piece of buttered toast. The contrast between the cold, sweet ice cream and the warm, savory toast is incredible. It’s a unique combination that works better than you’d think. The saltiness of the butter balances the sweetness of the protein.
Reheating: You don’t reheat ice cream, but if it’s too hard, let it thaw for a few minutes. Do not microwave it, as it will melt unevenly.
Flavor Development: The flavors meld together after a day in the freezer. If you make it ahead, taste it the next day. It might be even better as the ingredients have time to blend.
Nutritional Information & Benefits
This Ninja Creami Protein Shake is not just a treat; it’s a functional food. Here is a breakdown of what you are getting.
Protein: Each serving contains about 20-25 grams of protein, depending on the powder used. This is essential for muscle repair and satiety. It helps keep you full longer than regular ice cream.
Carbs: This recipe is low in carbohydrates, especially if you use unsweetened protein powder and minimal sweetener. It’s suitable for low-carb and keto diets.
Fat: The fat content comes from the cream and yogurt. It provides energy and helps with the absorption of fat-soluble vitamins. It’s not excessive, but enough to make the texture rich.
Sugar: By using stevia or erythritol, you can keep the sugar content near zero. This avoids the blood sugar spike associated with regular ice cream.
Allergens: This recipe contains dairy. If you are lactose intolerant, use lactose-free milk and protein. If you are allergic to whey, use a plant-based alternative.
Wellness Perspective: I find that eating this after a workout helps me recover faster. It’s a convenient way to get protein without drinking a shake. It feels like a reward, which makes sticking to a healthy diet easier.
Conclusion
Making a Ninja Creami Protein Shake is one of the simplest ways to upgrade your dessert game. It’s creamy, it’s delicious, and it’s good for you. I hope you try this recipe and enjoy it as much as I do.
Feel free to experiment with different flavors and mix-ins. The possibilities are endless. And don’t forget to pair it with a piece of buttered toast for the full experience.
If you make this recipe, please let me know how it turns out. Leave a comment below with your favorite flavor combination. I love hearing from you!
Happy blending, and enjoy your healthy treat!
Frequently Asked Questions
Can I use casein protein instead of whey?
Yes, but casein is thicker. You may need to add more liquid to ensure the machine can spin it properly. It will also result in a denser texture.
Why is my ice cream icy?
This usually means there isn’t enough fat or protein. Try adding a bit more cream or yogurt next time. Also, ensure the mixture is frozen solid.
Can I make this without a Ninja Creami?
It’s difficult to get the same texture with a regular blender or food processor. The Ninja Creami’s specific blade action is key to the smoothness. You can try freezing and blending in intervals, but it won’t be as good.
How long does it last in the freezer?
It lasts up to two weeks. However, the texture may degrade over time. Re-spinning it helps restore the creaminess.
Is this recipe keto-friendly?
Yes, if you use a keto-friendly protein powder and sweetener. Avoid sugars and high-carb mix-ins. The fat content from cream helps keep it in ketosis.
Pin This Recipe!
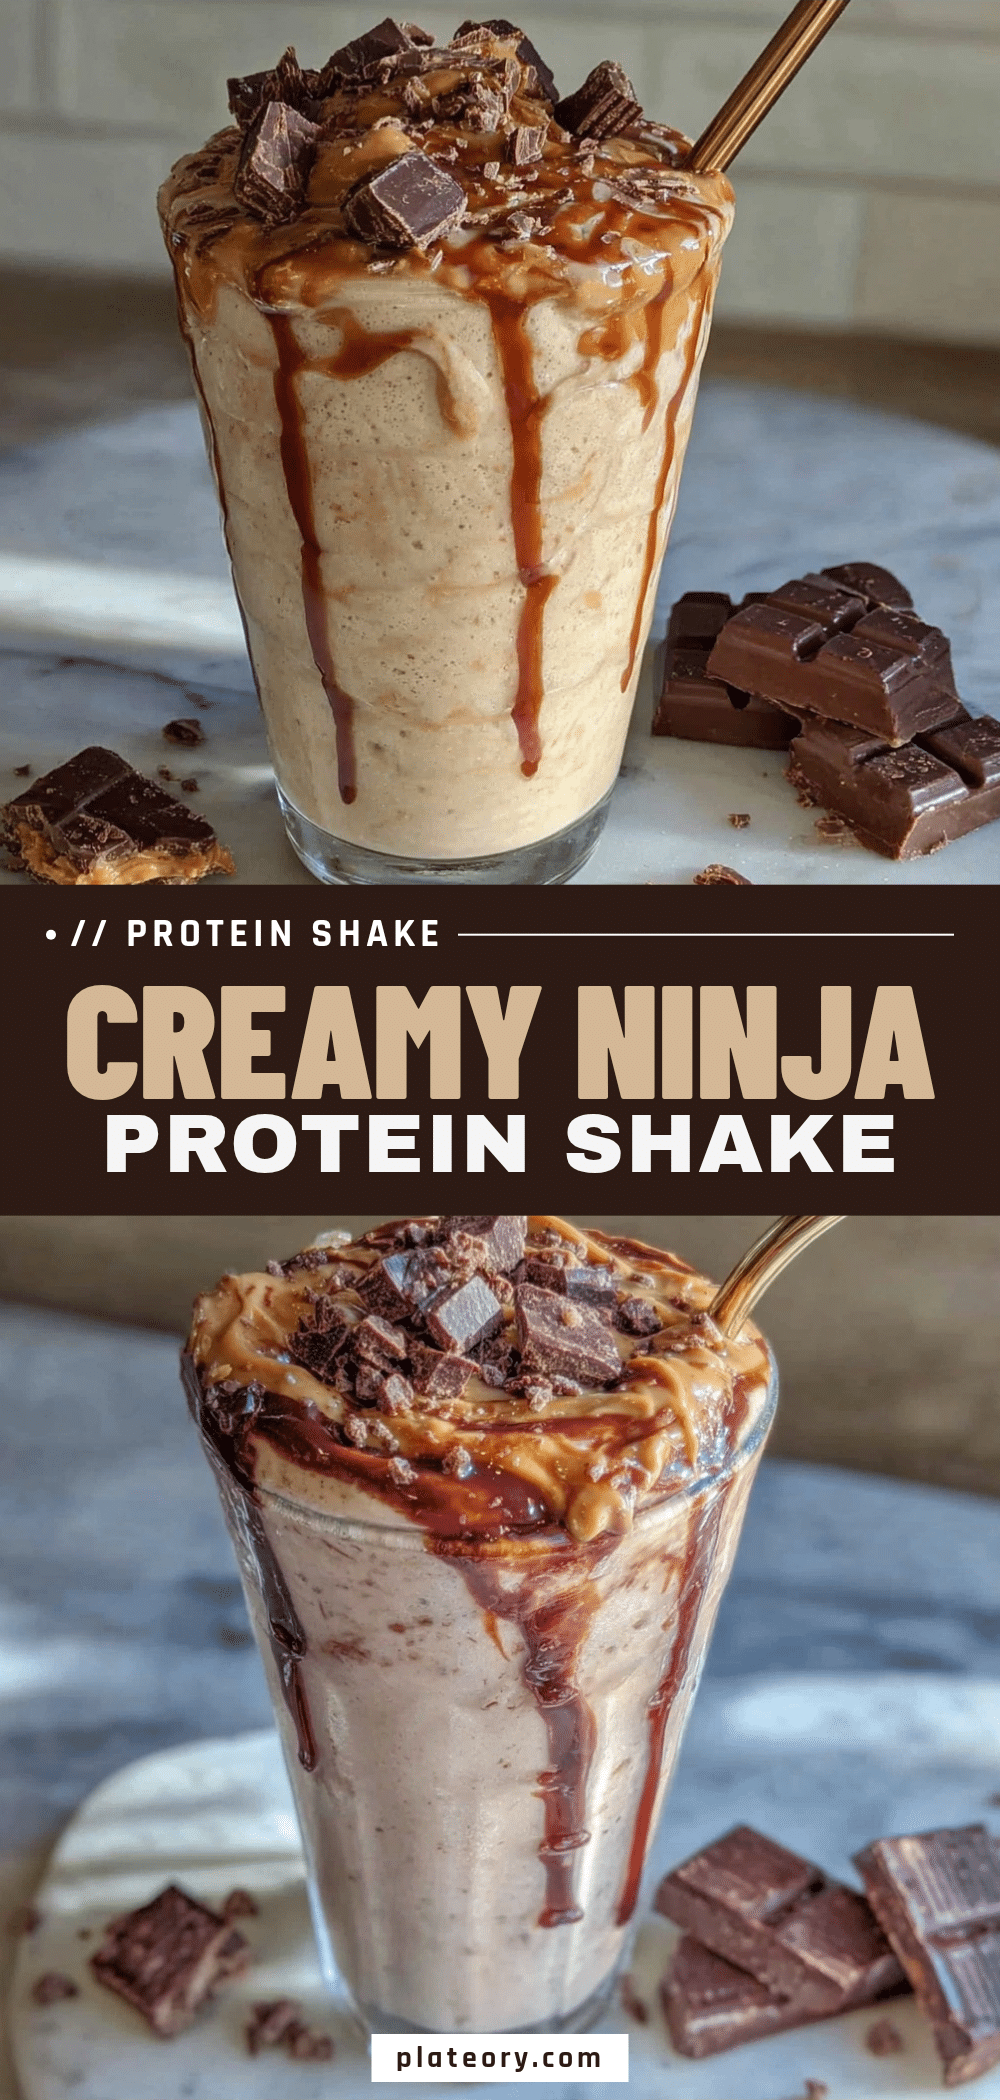

Ninja Creami Protein Shake: Easy 5-Minute Ice Cream Better With Toast
- Total Time: 15 minutes (plus 12-24 hours freezing time)
- Yield: 1 serving 1x
Description
A creamy, high-protein frozen dessert made in a Ninja Creami that tastes like high-end gelato but with 20 grams of protein. It is a quick, healthy post-workout treat that pairs surprisingly well with buttered toast.
Ingredients
- 25–30g Vanilla Whey Protein Isolate
- 2 tbsp Heavy Cream or Half-and-Half
- 1/4 cup Unsweetened Almond Milk or Whole Milk
- 2 tbsp Plain Greek Yogurt
- 1–2 packets Stevia or Erythritol (or to taste)
- 4–6 small Ice Cubes (optional)
- Pinch of Salt
Instructions
- Mix the base: In a small bowl or blender, combine whey protein powder, heavy cream, almond milk, Greek yogurt, sweetener, and salt. Whisk vigorously until completely smooth with no clumps.
- Pour the mixture into a Ninja Creami pint container, ensuring you do not fill past the ‘Max Fill’ line. Leave about half an inch of space at the top.
- Freeze solid: Place the lid on the pint and freeze for 12-24 hours until the mixture is hard as a rock.
- First Spin: Remove the pint from the freezer and let it sit on the counter for 10-15 minutes to take the edge off the cold. Place it in the Ninja Creami and select the ‘Lite Ice Cream’ setting. Press start.
- Re-Spin with Liquid: If the texture is powdery or crumbly after the first spin, remove the pint, add 1-2 tablespoons of milk or cream to the center, and select the ‘Re-Spin’ setting to achieve a creamy consistency.
- Add Mix-Ins (Optional): If desired, add chopped mix-ins like chocolate chips or nuts and select the ‘Mix-In’ setting to fold them in gently.
- Serve Immediately: Enjoy the ice cream immediately for a soft-serve consistency, or freeze for 30 minutes if a harder texture is preferred.
Notes
Ensure all ingredients are at room temperature before mixing, except for the final freeze. Let the frozen pint sit for 10-15 minutes before spinning to prevent jamming. If using casein protein, add more liquid as it is thicker. For dairy-free options, substitute whey with pea/soy protein and cream/milk with full-fat coconut milk.
- Prep Time: 2 minutes
- Cook Time: 0 minutes
- Category: Dessert
- Cuisine: American
Nutrition
- Serving Size: 1 pint container
- Calories: 250
- Sugar: 1
- Sodium: 100
- Fat: 12
- Saturated Fat: 7
- Carbohydrates: 5
- Protein: 20
Keywords: Ninja Creami, protein ice cream, high protein dessert, keto friendly, post workout snack, healthy ice cream, whey protein recipe