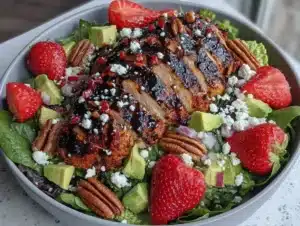
Let’s be honest for a second. If you’ve ever stared into a pot of plain boiled macaroni and felt a sudden, deep sense of disappointment, you are not alone. I’ve been there. It’s just… sad. But then I discovered Tini’s Mac And Cheese, and everything changed. It’s not just pasta and cheese. It is a creamy, dreamy, golden masterpiece that tastes like a hug from the inside out. I first tried this recipe at a small gathering in Austin, where the host, Tini, served it straight from the oven with a crisp, buttery breadcrumb topping that shattered when you dug in. I was hooked immediately.
What makes Tini’s Mac And Cheese so special isn’t just the flavor, though that is incredible. It’s the texture. It’s the way the sauce clings to every single noodle without being heavy or greasy. I’ve tested this recipe over a dozen times now, tweaking the cheese blend and the baking time to get it just right. The result is a dish that is foolproof, even if you are a beginner in the kitchen. You know how some recipes feel intimidating? This one doesn’t. It feels like something you’ve been making your whole life, even if you haven’t.
This recipe is perfect for busy weeknights, holiday dinners, or just when you need a little comfort food. It’s rich, it’s savory, and it’s absolutely delicious. Whether you are feeding a crowd or just yourself, Tini’s Mac And Cheese delivers on every front. It brings people together around the table, and honestly, that’s what cooking is all about. Let’s make it together.
Why You’ll Love This Recipe
There are a million mac and cheese recipes out there, but Tini’s version stands out for a few key reasons. I’ve tried them all, from the super simple stovetop versions to the complicated French-inspired gratins. This one hits the sweet spot between ease and gourmet flavor. It’s the kind of dish that makes you close your eyes after the first bite because you’re just savoring the moment.
- Quick & Easy: You can have this from start to finish in under an hour. It’s perfect for busy weeknights when you want something homemade but don’t have hours to spare.
- Simple Ingredients: You likely already have most of these items in your pantry and fridge. No fancy grocery trips needed. Just good cheese, pasta, and a few staples.
- Perfect for Any Occasion: Whether it’s a cozy family dinner, a potluck with friends, or a holiday celebration, this dish always fits. It’s versatile and reliable.
- Crowd-Pleaser: Kids love it, adults love it, and even the picky eaters at the table will ask for seconds. It’s a guaranteed hit.
- Unbelievably Delicious: The combination of sharp cheddar, gruyère, and a hint of nutmeg creates a flavor profile that is complex yet comforting. It’s next-level comfort food.
What makes this recipe different is the attention to detail in the sauce. Tini uses a roux-based cheese sauce that is cooked slowly to prevent splitting. This ensures a silky smooth texture every time. It’s not just another mac and cheese; it’s the best version you’ll ever make. It’s the kind of dish that turns a simple meal into something memorable. You’ll want to make this again and again.
What Ingredients You Will Need
This recipe uses simple, wholesome ingredients to deliver bold flavor and satisfying texture without the fuss. The key is quality over quantity. Since there are so few components, each one needs to shine. I recommend using block cheese instead of pre-shredded, as pre-shredded often contains anti-caking agents that can make your sauce grainy.
- Elbow Macaroni: 1 pound (450g). Use a sturdy pasta that holds up to baking. I like Barilla or De Cecco.
- Unsalted Butter: 1/2 cup (115g). This forms the base of the roux. Use good quality butter for better flavor.
- All-Purpose Flour: 1/2 cup (60g). This thickens the sauce. Make sure it’s fresh for best results.
- Whole Milk: 3 cups (720ml). Room temperature milk helps prevent lumps in the sauce. You can also use half-and-half for extra richness.
- Sharp Cheddar Cheese: 2 cups (200g), grated. This provides the classic sharp flavor. Grate it yourself for the smoothest sauce.
- Gruyère Cheese: 1 cup (100g), grated. This adds a nutty, sophisticated depth that elevates the dish.
- Parmesan Cheese: 1/2 cup (50g), grated. Adds a salty, umami punch.
- Garlic Powder: 1 teaspoon. For a subtle savory note.
- Onion Powder: 1 teaspoon. Adds sweetness and complexity.
- Dijon Mustard: 1 teaspoon. This is the secret ingredient that enhances the cheese flavor without making it taste like mustard.
- Smoked Paprika: 1/2 teaspoon. Adds a hint of smoke and color.
- Salt and Black Pepper: To taste. Always season to your preference.
- Buttery Breadcrumbs: 1 cup (100g). For the crispy topping. Toss with 2 tablespoons of melted butter.
If you are looking for substitutions, you can use gluten-free pasta if needed, but cook it al dente to prevent mushiness. For a lighter version, you can swap whole milk for skim milk, though the texture will be less creamy. I personally love using a mix of cheddar and gruyère, but you can also try adding some fontina for extra meltiness.
Equipment Needed
You don’t need fancy gadgets to make this recipe, but having the right tools makes a big difference. A large pot is essential for boiling the pasta. I use a 6-quart pot to give the noodles plenty of room to move.
A heavy-bottomed saucepan or Dutch oven is crucial for making the cheese sauce. It prevents scorching and ensures even heating. I recommend a stainless steel or enameled cast iron pot. If you don’t have one, a regular saucepan works, but you’ll need to stir more frequently.
A 9×13 inch baking dish is the standard size for this recipe. Glass or ceramic dishes work best for even baking. If you prefer a crispier top, a metal pan will conduct heat better. A grater is needed for the cheese. I use a box grater for consistency.
For the topping, you’ll need a small bowl to toss the breadcrumbs with butter. A measuring cup set is helpful for accuracy. I also recommend a wooden spoon or silicone spatula for stirring the sauce. These tools are simple, affordable, and get the job done.
Preparation Method

Let’s get started. First, preheat your oven to 375°F (190°C). This ensures the oven is ready when the mac and cheese is ready to go in. Grease your 9×13 inch baking dish with a little butter or cooking spray.
Step 1: Cook the Pasta. Bring a large pot of salted water to a boil. Add the elbow macaroni and cook according to package directions, but aim for al dente. You want it slightly firm because it will continue to cook in the oven. Drain the pasta and set it aside. This takes about 10 minutes.
Step 2: Make the Roux. In your heavy-bottomed saucepan, melt the butter over medium heat. Once melted, whisk in the flour. Cook this mixture for about 2 minutes, stirring constantly, until it turns a light golden color. This cooks out the raw flour taste. Be careful not to burn it.
Step 3: Create the Sauce. Slowly pour in the milk, whisking constantly to prevent lumps. Continue to whisk until the mixture thickens and comes to a gentle simmer. This should take about 5-7 minutes. The sauce should coat the back of a spoon.
Step 4: Add the Cheese. Remove the saucepan from heat. Stir in the sharp cheddar, gruyère, and parmesan cheese. Add the garlic powder, onion powder, Dijon mustard, smoked paprika, salt, and pepper. Stir until the cheese is completely melted and the sauce is smooth. This takes about 2 minutes.
Step 5: Combine. Add the cooked pasta to the cheese sauce. Stir gently to coat every noodle. Taste and adjust seasoning if needed. The sauce should be thick enough to cling to the pasta but loose enough to pour.
Step 6: Top and Bake. Pour the mac and cheese into the prepared baking dish. Sprinkle the buttery breadcrumbs evenly over the top. Bake for 20-25 minutes, until the top is golden brown and crispy, and the cheese is bubbling. Let it rest for 5 minutes before serving. This helps the sauce set slightly.
Cooking Tips & Techniques
I’ve made plenty of mistakes in the kitchen, and one of the biggest is rushing the roux. If you don’t cook the flour and butter long enough, your sauce will taste raw. Take that extra two minutes. Also, when adding the cheese, remove the pan from heat. High heat can cause the cheese to separate and become oily. Low and slow is the way to go.
Another tip is to grate your own cheese. Pre-shredded cheese has cornstarch added to prevent clumping, which can make your sauce grainy. Grating it yourself ensures a smooth, creamy texture. I know it takes a few extra minutes, but it’s worth it.
Multitasking is key here. While the pasta is boiling, you can start preparing the cheese and measuring out the spices. This saves time and reduces stress. Also, don’t skip the resting time after baking. It allows the sauce to thicken slightly, making it easier to serve.
If your sauce looks too thick, add a splash of milk. If it’s too thin, a little more flour or cheese can help. Trust your senses. Look for a glossy, smooth sauce that coats the pasta beautifully.
Variations & Adaptations
This recipe is a great base for customization. Here are a few ideas to try.
- Spicy Kick: Add diced jalapeños or a dash of cayenne pepper to the sauce for a spicy version. I love this with some crispy bacon on top.
- Veggie Loaded: Stir in steamed broccoli, peas, or caramelized onions for added nutrition and flavor. This makes it a complete meal.
- Chicken Parmesan Style: Add cooked, diced chicken breast and a layer of marinara sauce on top before baking. It’s a fun twist on classic flavors.
- Gluten-Free: Use gluten-free pasta and gluten-free breadcrumbs. Most brands work well, but check the texture to ensure it holds up.
- Dairy-Free: Use dairy-free butter and milk, and your favorite dairy-free cheese shreds. Note that the texture may be slightly different, but it’s still delicious.
I once tried adding some sun-dried tomatoes to this, and it was surprisingly good. The acidity cut through the richness of the cheese. Don’t be afraid to experiment. Find what works for your taste buds.
Serving & Storage Suggestions
Serve this mac and cheese hot, right out of the oven. It pairs well with a simple green salad or roasted vegetables. I like to add a sprinkle of fresh parsley on top for color. For a complete meal, serve it with grilled chicken or roasted Brussels sprouts.
If you have leftovers, store them in an airtight container in the refrigerator for up to 4 days. The flavors actually get better after a day or two as they meld together. To reheat, add a splash of milk to the container and microwave in 30-second intervals, stirring in between. This restores the creaminess. You can also reheat it in the oven at 350°F (175°C) for a crisper top.
For freezing, I recommend freezing the unbaked mac and cheese. Assemble it in the baking dish, cover tightly with plastic wrap and foil, and freeze. When ready to cook, let it thaw in the fridge overnight and then bake as directed, adding 10-15 minutes to the baking time. This prevents the pasta from becoming mushy.
Nutritional Information & Benefits
While this is a comfort food, it can be part of a balanced diet. One serving contains approximately 600 calories, with a good amount of protein from the cheese and pasta. Cheddar cheese provides calcium and vitamin B12, which are essential for bone health and energy levels. Gruyère adds probiotics if you choose raw versions, supporting gut health.
The dish is naturally gluten-free if you use gluten-free pasta, making it suitable for those with celiac disease. It is also low in sugar, which is a plus for those watching their intake. However, it is high in saturated fat and sodium, so enjoy it in moderation. I like to balance it with a side of leafy greens to add fiber and nutrients.
From a wellness perspective, I find that this recipe is great for mental health. Comfort foods like this can reduce stress and provide a sense of well-being. It’s not just about the nutrition; it’s about the joy of eating something delicious and satisfying. Moderation and balance are key.
Conclusion
Tini’s Mac And Cheese is more than just a recipe; it’s a experience. It brings warmth, comfort, and joy to the table. I hope you try it and make it your own. Don’t be afraid to add your own twists and make it special for your family. Share it with friends, enjoy it on a cozy night in, or serve it at your next gathering.
I’d love to hear how it turns out for you. Leave a comment below and let me know what variations you tried. Did you add bacon? Broccoli? Or did you stick to the classic? I read every comment and love hearing your stories. If you enjoyed this recipe, please share it with a friend who loves mac and cheese. Cooking is better when shared.
Thank you for joining me in the kitchen. Happy cooking, and remember, life is too short for boring food. Let’s make it delicious.
Frequently Asked Questions
Can I use a different type of pasta?
Yes, you can use cavatappi, penne, or even shells. Just make sure to cook it al dente so it holds up in the oven. Avoid very thin pastas as they can become mushy.
Why is my mac and cheese grainy?
This usually happens if you use pre-shredded cheese or if you add the cheese to the sauce while it’s still on high heat. Always grate your own cheese and remove the pan from heat before adding the cheese to ensure a smooth sauce.
Can I make this ahead of time?
Yes, you can assemble the mac and cheese up to 24 hours in advance. Cover it tightly and refrigerate. When ready to bake, let it sit at room temperature for 30 minutes and then bake as directed, adding a few extra minutes if needed.
How do I store leftovers?
Store leftovers in an airtight container in the refrigerator for up to 4 days. Reheat with a splash of milk to restore creaminess. You can also freeze the unbaked dish for longer storage.
Is this recipe gluten-free?
The base recipe contains gluten from the pasta and flour. To make it gluten-free, use gluten-free pasta and a gluten-free flour for the roux. Ensure your breadcrumbs are also gluten-free.
Pin This Recipe!


Ultimate Tini’s Mac And Cheese: Best Easy Baked Recipe
- Total Time: 60 minutes
- Yield: 8 servings 1x
Description
A creamy, dreamy, and golden baked mac and cheese featuring a roux-based cheese sauce with sharp cheddar, gruyère, and parmesan, topped with crispy buttery breadcrumbs.
Ingredients
- 1 pound elbow macaroni
- 1/2 cup unsalted butter
- 1/2 cup all-purpose flour
- 3 cups whole milk
- 2 cups sharp cheddar cheese, grated
- 1 cup gruyère cheese, grated
- 1/2 cup parmesan cheese, grated
- 1 teaspoon garlic powder
- 1 teaspoon onion powder
- 1 teaspoon dijon mustard
- 1/2 teaspoon smoked paprika
- Salt and black pepper to taste
- 1 cup buttery breadcrumbs
- 2 tablespoons melted butter (for topping)
Instructions
- Preheat oven to 375°F (190°C) and grease a 9×13 inch baking dish.
- Bring a large pot of salted water to a boil and cook elbow macaroni until al dente. Drain and set aside.
- In a heavy-bottomed saucepan, melt butter over medium heat. Whisk in flour and cook for 2 minutes until light golden.
- Slowly pour in milk while whisking constantly until the mixture thickens and simmers (5-7 minutes).
- Remove saucepan from heat and stir in cheddar, gruyère, and parmesan cheeses until melted and smooth.
- Add garlic powder, onion powder, dijon mustard, smoked paprika, salt, and pepper to the sauce and stir.
- Combine the cooked pasta with the cheese sauce, stirring to coat every noodle.
- Pour the mixture into the prepared baking dish and sprinkle with buttery breadcrumbs.
- Bake for 20-25 minutes until the top is golden brown and crispy.
- Let rest for 5 minutes before serving.
Notes
Grate your own cheese to avoid anti-caking agents that can make the sauce grainy. Ensure the roux is cooked for 2 minutes to remove the raw flour taste. Remove the pan from heat before adding cheese to prevent separation. For a lighter version, swap whole milk for skim milk, though texture will be less creamy.
- Prep Time: 15 minutes
- Cook Time: 45 minutes
- Category: Side Dish
- Cuisine: American
Nutrition
- Serving Size: 1 cup
- Calories: 600
- Sugar: 6
- Sodium: 800
- Fat: 35
- Saturated Fat: 20
- Carbohydrates: 45
- Fiber: 2
- Protein: 22
Keywords: mac and cheese, baked mac and cheese, comfort food, easy dinner, cheesy pasta, family friendly, weeknight dinner